Stamp Community Family of Web Sites
Thousands of stamps, consistently graded, competitively priced and hundreds of in-depth blog posts to read


Stamp Community Forum
 
Username:
Password:
Save Password
Forgot your Password?

This page may contain links that result in small commissions to keep this free site up and running.

Welcome Guest! Registering and/or logging in will remove the anchor (bottom) ads. It's Free!

Tutorial Isolating Cancels - Third Part Added

Previous Page
 
To participate in the forum you must log in or register.
Author Previous TopicReplies: 26 / Views: 3,038Next Topic
Page: of 2
Pillar Of The Community
United States
2547 Posts
Posted 04/25/2011   10:26 pm  Show Profile Bookmark this reply Add Russ to your friends list  Get a Link to this Reply
Here is a steel cancel 3-link chain (Odd Fellows)


1. Open the image in GIMP

2. Decompose the image into monochrome images [colors-components-decompose]

In the decompose box make sure that the color model is RGB and that the decompose to layers is not selected, click OK.

Save the red image as a working file and discard the others.

3. Open the brightness/contrast levels window [colors-levels]

Since we are trying to capture the cancel start off by moving the black to the right and the white to the left to get a good image. Move the contrast to balance the output. You will notice that the area of the cancel that is poorly struck tries to fade out. Fine adjust the 3 triangles to get the best image. Click OK


Now save the image as a JPG
Send note to Staff  Go to Top of Page
Edited by Russ - 04/25/2011 10:39 pm
Pillar Of The Community
United States
2547 Posts
Posted 04/25/2011   10:26 pm  Show Profile Bookmark this reply Add Russ to your friends list  Get a Link to this Reply
This is a post Civil War cork strike of north-south shaking hands


1. Open the image in GIMP

2. Decompose the image into monochrome images [colors-components-decompose]

In the decompose box make sure that the color model is RGB and that the decompose to layers is not selected, click OK.

Save the red image as a working file and discard the others.

3. Open the brightness/contrast levels window [colors-levels]

Since we are trying to capture the cancel start off by moving the black to the right and the white to the left to get a good image. Move the contrast to balance the output. Fine adjust the 3 triangles to get the best image. Click OK


Now save the image as a JPG

This image can be color inverted [colors-invert] to produce a striking example

Send note to Staff  Go to Top of Page
Edited by Russ - 04/25/2011 10:42 pm
Pillar Of The Community
United States
2547 Posts
Posted 04/25/2011   10:27 pm  Show Profile Bookmark this reply Add Russ to your friends list  Get a Link to this Reply
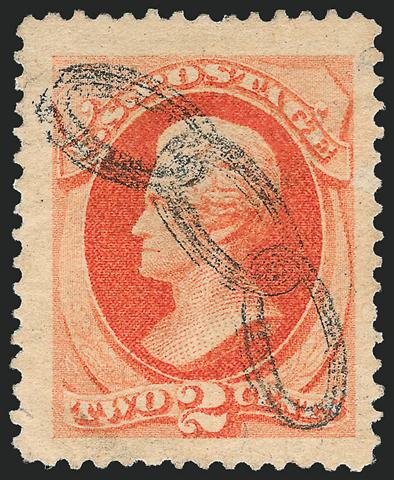
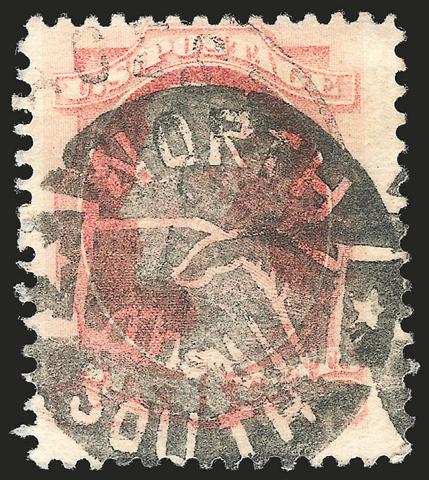
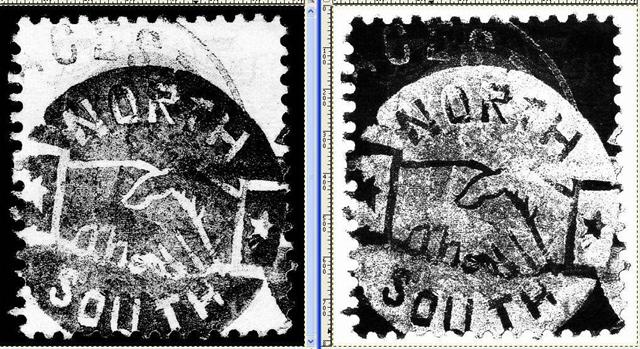
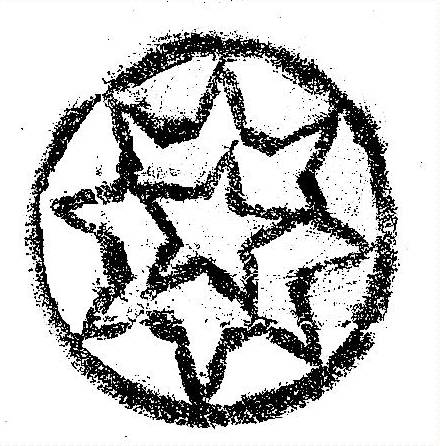
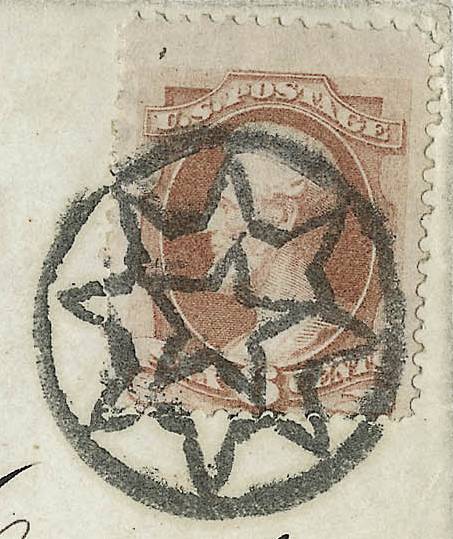
There have been several references to the New York Foreign Mail cancels in the forums so let's do one.


1. Open the image in GIMP

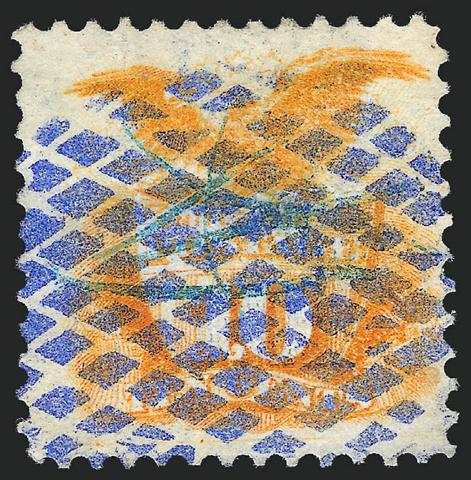
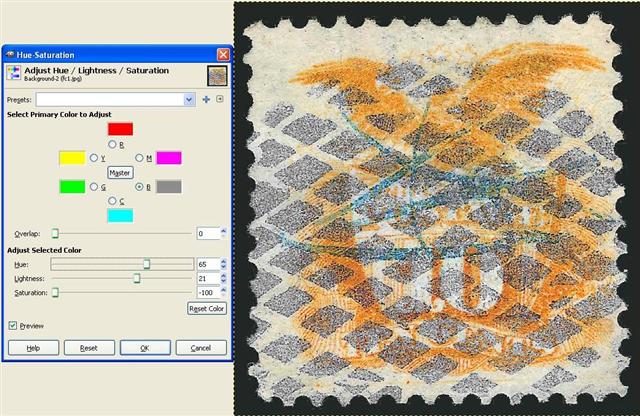
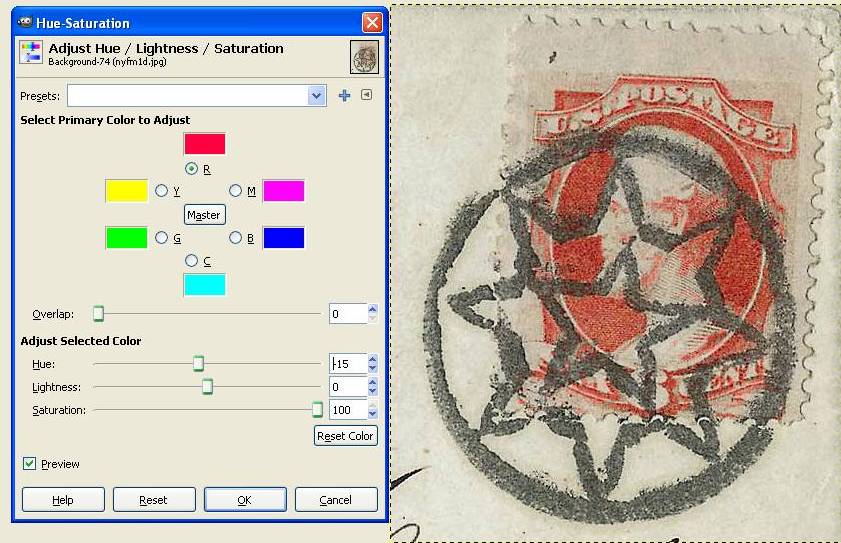
2. The brownish color will be a problem on isolating the cancel so we will adjust the hue/saturation to produce a more compatible color [colors-hue/saturation]
Select red and adjust the sliders


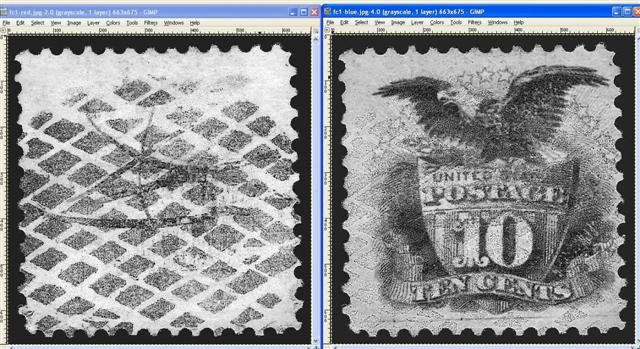
3. Decompose the image into monochrome images [colors-components-decompose]

In the decompose box make sure that the color model is RGB and that the decompose to layers is not selected, click OK.

Save the red image as a working file and discard the others.
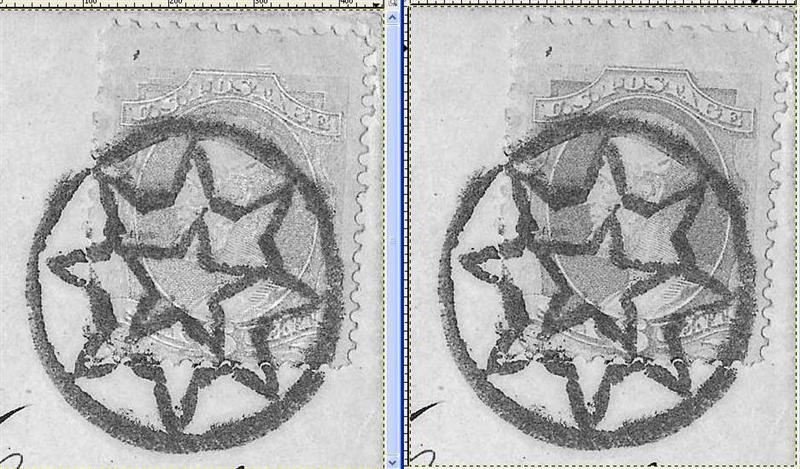
Below are the red images with (left) and without (right) hue-saturation adjustment


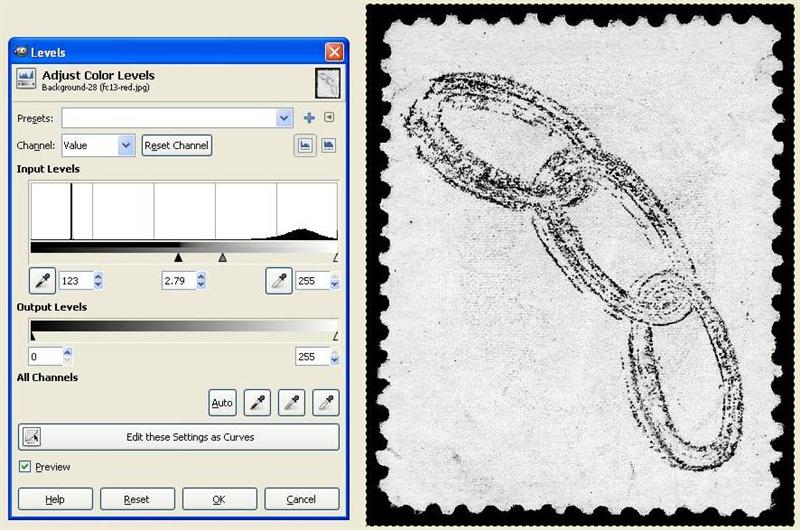
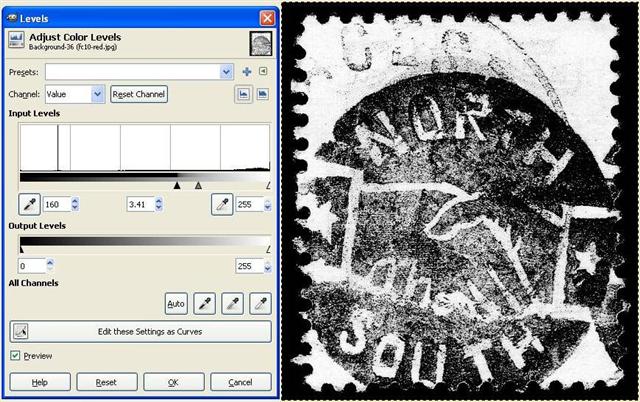
4. Open the brightness/contrast levels window [colors-levels]

Since we are trying to capture the cancel start off by moving the black to the right and the white to the left to get a good image. Move the contrast to balance the output. Fine adjust the 3 triangles to get the best image. Click OK

Send note to Staff  Go to Top of Page
Edited by Russ - 04/25/2011 10:48 pm
Pillar Of The Community
United States
2547 Posts
Posted 04/25/2011   10:27 pm  Show Profile Bookmark this reply Add Russ to your friends list  Get a Link to this Reply
4. Now I am going to crop the image [tools-selection tools-rectangle select] and set the selection frame with the mouse
Then crop [image-crop to selection]

5. Last thing I will do is to remove some of the shadowing on the top and the perf shadows on the right and the address manuscript on bottom left.

Select the color picker tool (eye dropper) from the toolbox to set the pallet color
Move it into the white background of the image and left click to pick the color to the color pallet.


Select the paintbrush from the tool box


Select the brush size


The brush will appear as a dashed line circle hold the left mouse button down and sweep the areas for clean-up. Release the mouse button to reposition the brush from area to area. You can use undo if you hit the image [edit-undo paintbrush]


When the areas are cleaned save the file as JPG


Send note to Staff  Go to Top of Page
Edited by Russ - 04/25/2011 10:53 pm
Pillar Of The Community
United States
2547 Posts
Posted 04/25/2011   10:27 pm  Show Profile Bookmark this reply Add Russ to your friends list  Get a Link to this Reply
Here is a nice bluish purple diamond grid with pen cancel underneath. These techniques also work with color cancels.


1. Open the image in GIMP

2. Decompose the image into monochrome images [colors-components-decompose]

In the decompose box make sure that the color model is RGB and that the decompose to layers is not selected, click OK.

The red image isolates the cancel and the blue image show the detail of the stamp


Now lets get a good look at the pen cancel. From the original scan we will adjust the hue/saturation [colors-hue/saturation]

Send note to Staff  Go to Top of Page
Edited by Russ - 04/25/2011 10:55 pm
Bedrock Of The Community
Australia
38679 Posts
Posted 04/26/2011   9:44 pm  Show Profile Bookmark this reply Add rod222 to your friends list  Get a Link to this Reply


This is a marvelous thread.

Suggestion to Moderators: Is it possible to have this as a "sticky" ?
Send note to Staff  Go to Top of Page
Pillar Of The Community
United States
1518 Posts
Posted 04/26/2011   9:50 pm  Show Profile Bookmark this reply Add bfranton to your friends list  Get a Link to this Reply
Poking bug with stick... why preferably bmp vs jpg? come on guys why? what possible difference?
Send note to Staff  Go to Top of Page
Pillar Of The Community
United States
2547 Posts
Posted 04/26/2011   9:54 pm  Show Profile Bookmark this reply Add Russ to your friends list  Get a Link to this Reply
Barb, JPG are great for finished images but they tend to degrade each time they are changed and save. Using BMP maintains quality through the editing process.
Edit: I will post some more on working with difficult colors and other more advanced techniques in a few days.
Send note to Staff  Go to Top of Page
Edited by Russ - 04/26/2011 10:00 pm
Pillar Of The Community
United States
1518 Posts
Posted 04/26/2011   10:16 pm  Show Profile Bookmark this reply Add bfranton to your friends list  Get a Link to this Reply
Thanks! So now, do I need a macro to edit all my jpg files to bmp?
Send note to Staff  Go to Top of Page
Pillar Of The Community
United States
2547 Posts
Posted 04/26/2011   10:25 pm  Show Profile Bookmark this reply Add Russ to your friends list  Get a Link to this Reply
JPG is my preferred format for image storage and transfer. I only use BMP format when I am manipulating the images. I simply open the JPG and save it as BMP before isolating the cancels.
Send note to Staff  Go to Top of Page
Pillar Of The Community
Australia
687 Posts
Posted 04/27/2011   04:31 am  Show Profile Bookmark this reply Add Perf14 to your friends list  Get a Link to this Reply
Russ, I guess that would apply to all types of editing - it's better to work with a BMP file?

But once you change the file to a jpg, don't you lose some information? So the next time you work on the file and change it back to a BMP it will not be as good as the original BMP?

If that was confusing ...you should see it from my end!

Thanks, by the way, it's a great thread!

alex
Send note to Staff  Go to Top of Page
Page: of 2 Previous TopicReplies: 26 / Views: 3,038Next Topic  
Previous Page
 
To participate in the forum you must log in or register.

Go to Top of Page

Disclaimer: While a tremendous amount of effort goes into ensuring the accuracy of the information contained in this site, Stamp Community assumes no liability for errors. Copyright 2005 - 2026 Stamp Community Family - All rights reserved worldwide. Use of any images or content on this website without prior written permission of Stamp Community or the original lender is strictly prohibited.
Privacy Policy / Terms of Use    Advertise Here
Stamp Community Forum © 2007 - 2026 Stamp Community Forums
It took 0.3 seconds to lick this stamp. Powered By: Snitz Forums 2000 Version 3.4.05