I get a bit fed up with using a perforation gauge, particularly in winter when the it can get charged with static electricity and the stamp sticks to it. This has held me back from checking out some of my older stamps which may come in a variety of perfs. I have also tried commercial software for checking perfs but these seem easily thrown out by the heavy postmarks and other surface blemishes which are common on older stamps.
I think that I now have it sorted out. I took my trusty old Unitrade perf gauge and scanned it at my usual stamp resolution (1200dpi). I then opened the resulting image in the CorelDraw suite of graphics programs and:
1. Cut a hole where the gauge lines are, making sure that a left stub ends of all the lines. Just mark off the area and delete. This left that area totally transparent.
2. Drew in lines between the stubs to replace the gauge lines.
3. Saved the image as a PNG file so the the area under the gauge lines remains transparent.
To use the perf gauge, I open a stamp image in PhotoPaint (part of CorelDraw), then import the perf gauge image.
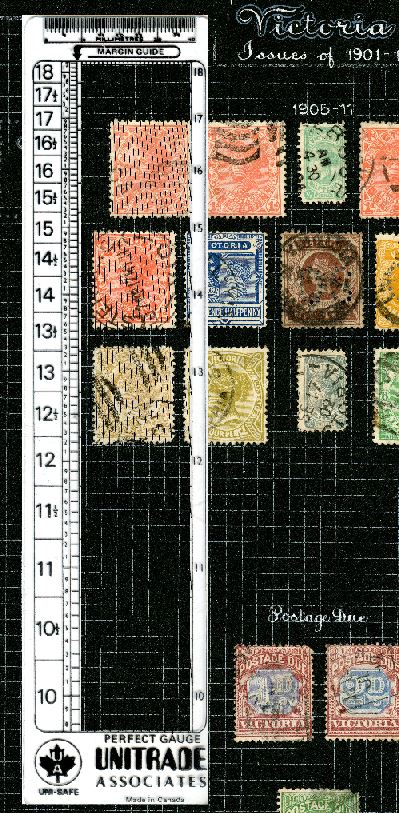
Here is a picture of the perf gauge on an album page. Note that at this resolution the lines tend to break up as they are quite thin.
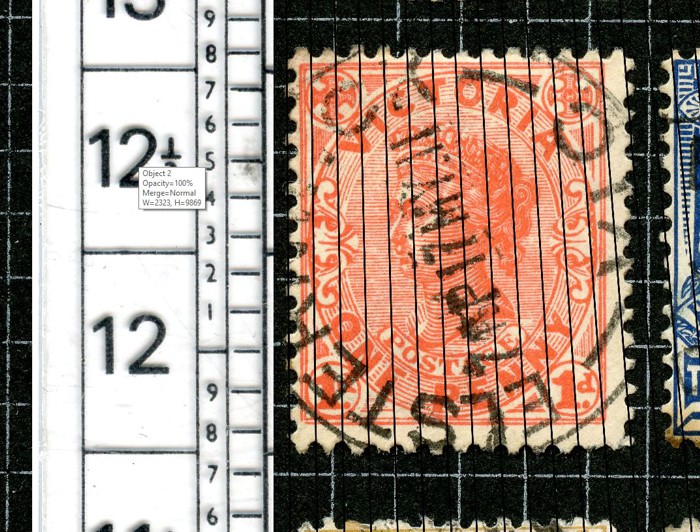
Next is a picture zoomed in to check the lower horizontal perf of the first stamp in the second row. The measured perf is just a tad over 11¾, thus agreeing with the SG specification 12.
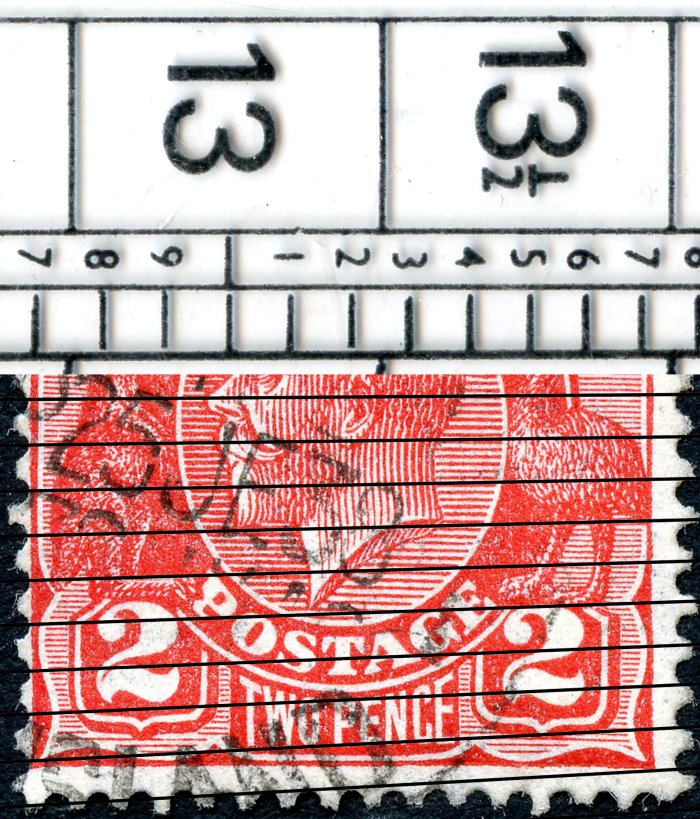
Finally, this is a picture with the gauge rotated through 90 degrees, being used to measure the vertical perf on an image of a single stamp. Note that image of the gauge is not visible outside the bounds of the stamp's image. For best accuracy, I line up the the gauge lines across the entire height of the stamp. Then I scroll the gauge down to read off the actual perf, in this case 12.7 which agrees with the SG value of 12½.
In all cases so far, I have found that the perfs measured in this way conform with expectations. So now, maybe, my older stamps will not languish on the top shelf.


