Stamp Community Family of Web Sites
Thousands of stamps, consistently graded, competitively priced and hundreds of in-depth blog posts to read


Stamp Community Forum
 
Username:
Password:
Save Password
Forgot your Password?

This page may contain links that result in small commissions to keep this free site up and running.

Welcome Guest! Registering and/or logging in will remove the anchor (bottom) ads. It's Free!

The 1972-1978 Caricature And Landscape Issue Of Canada

Previous Page | Next Page    
 
To participate in the forum you must log in or register.
Author Previous TopicReplies: 139 / Views: 10,822Next Topic
Page: of 10
Rest in Peace
Netherlands
963 Posts
Posted 02/02/2019   1:54 pm  Show Profile Bookmark this reply Add Galeoptix to your friends list  Get a Link to this Reply
Chris,

This table is confusing anyhow!

BTW, the "ribbing" in the Caricature is NOT the "ribbing" in the Wildings!

Rein
Send note to Staff  Go to Top of Page
Valued Member
Canada
97 Posts
Posted 02/02/2019   11:11 pm  Show Profile Bookmark this reply Add Brixtonchrome to your friends list  Get a Link to this Reply
Hi Rein.

yes! You are right. Unitrade uses the term ribbed quite loosely.

Send note to Staff  Go to Top of Page
Rest in Peace
Netherlands
963 Posts
Posted 02/03/2019   12:49 pm  Show Profile Bookmark this reply Add Galeoptix to your friends list  Get a Link to this Reply
Fluorescence is a matter not quite understood by philatelists!

Around 1974 Dutch collectors started to distinguish two types of paper: D [dull] and W [hibrite] for the coil stamps of the 1948-1967 period.

All definitives stamps were printed in photogravure on uncoated paper. I started to study under UV the Dutch definitives both from counter sheets, coils and booklets and I discovered 2 independent phenomena!

Before 1958 there was NO optical brightening agent added to the paper pulp, from 1958 onwards [white reacting] fluorescent fibres began to appearin a otherwise dull [no OBA] paper. The frequency [quantity per stamp] of the fibres [Leuchtfasern] was increasing in time so by 1966 there was virtually no way to tell the fibres apart.

In the mean time in 1961 the Dutch commemoratives were printed on coated paper with OBA both in the paper pulp as in the coating, no fluorescent fibres!

But also in the 1961-1967 period the intensity of the OBA of either coating or paper was increasing.

Thus, we have (in theory) a 3-dimensional space in which both the number of fibres per surface unit varies as well as the quantity of OBA substance varies in coating and/or paper pulp.

I stuck to - in 1974 my article was published - 6 levels for the uncoated papers: D [dull], V0, V1, V2, V3, W[hite] [the Dutch word "Vuil" meaning "dirty"].

In the V-range all you can do is estimating the number of fibres, realising that independently the OBA may have been added as well and may give a brighter appearance.

Already then, I had to be carefull with used/washed off stamps thst could have acquired OBA's from the enveloppes they wre on.

Later on, in the late 1980-ies, with the atention for environmental effects of the OBA's, dull paper returned [OBA-free] with a different appearance under V! Before 1958 dull meant a yellowish/brownish appearance, since the late 1980-ies it has a violet appearance as if the UV-light was reflected! This goes for both the paper pulp as well as for the coatings.

Dutch commemoratives in the 1971-1998 period were on coated paper delivered by Harrison&Sons predominantly, with a phosphoresent substance in the coating. This changed in 1998 -Harrison stopped - and since then for Dutch commemoratives Tullis Russell is the main source of paper. Still coated paper but no phosphorescence in the coating, printed bars entered the scene, and the UV-reaction of the coating was violet inert.
Send note to Staff  Go to Top of Page
Valued Member
Canada
97 Posts
Posted 02/03/2019   7:01 pm  Show Profile Bookmark this reply Add Brixtonchrome to your friends list  Get a Link to this Reply
Rein,

I agree that this topic is misunderstood. I devised my own scale to study fluorescence. Like what you describe it distinguishes between the density and brightess of fluorescent fibres in the pulp as well as the ambient fluorescence level of the paper, which you would call the amount of OBA added to the pulp. Canada has used Tullis Russell paper primarily since about 1998, so virtually all stamps since then are printed on dull paper, with the violet reaction you describe.
Send note to Staff  Go to Top of Page
Valued Member
Canada
97 Posts
Posted 02/05/2019   7:18 pm  Show Profile Bookmark this reply Add Brixtonchrome to your friends list  Get a Link to this Reply
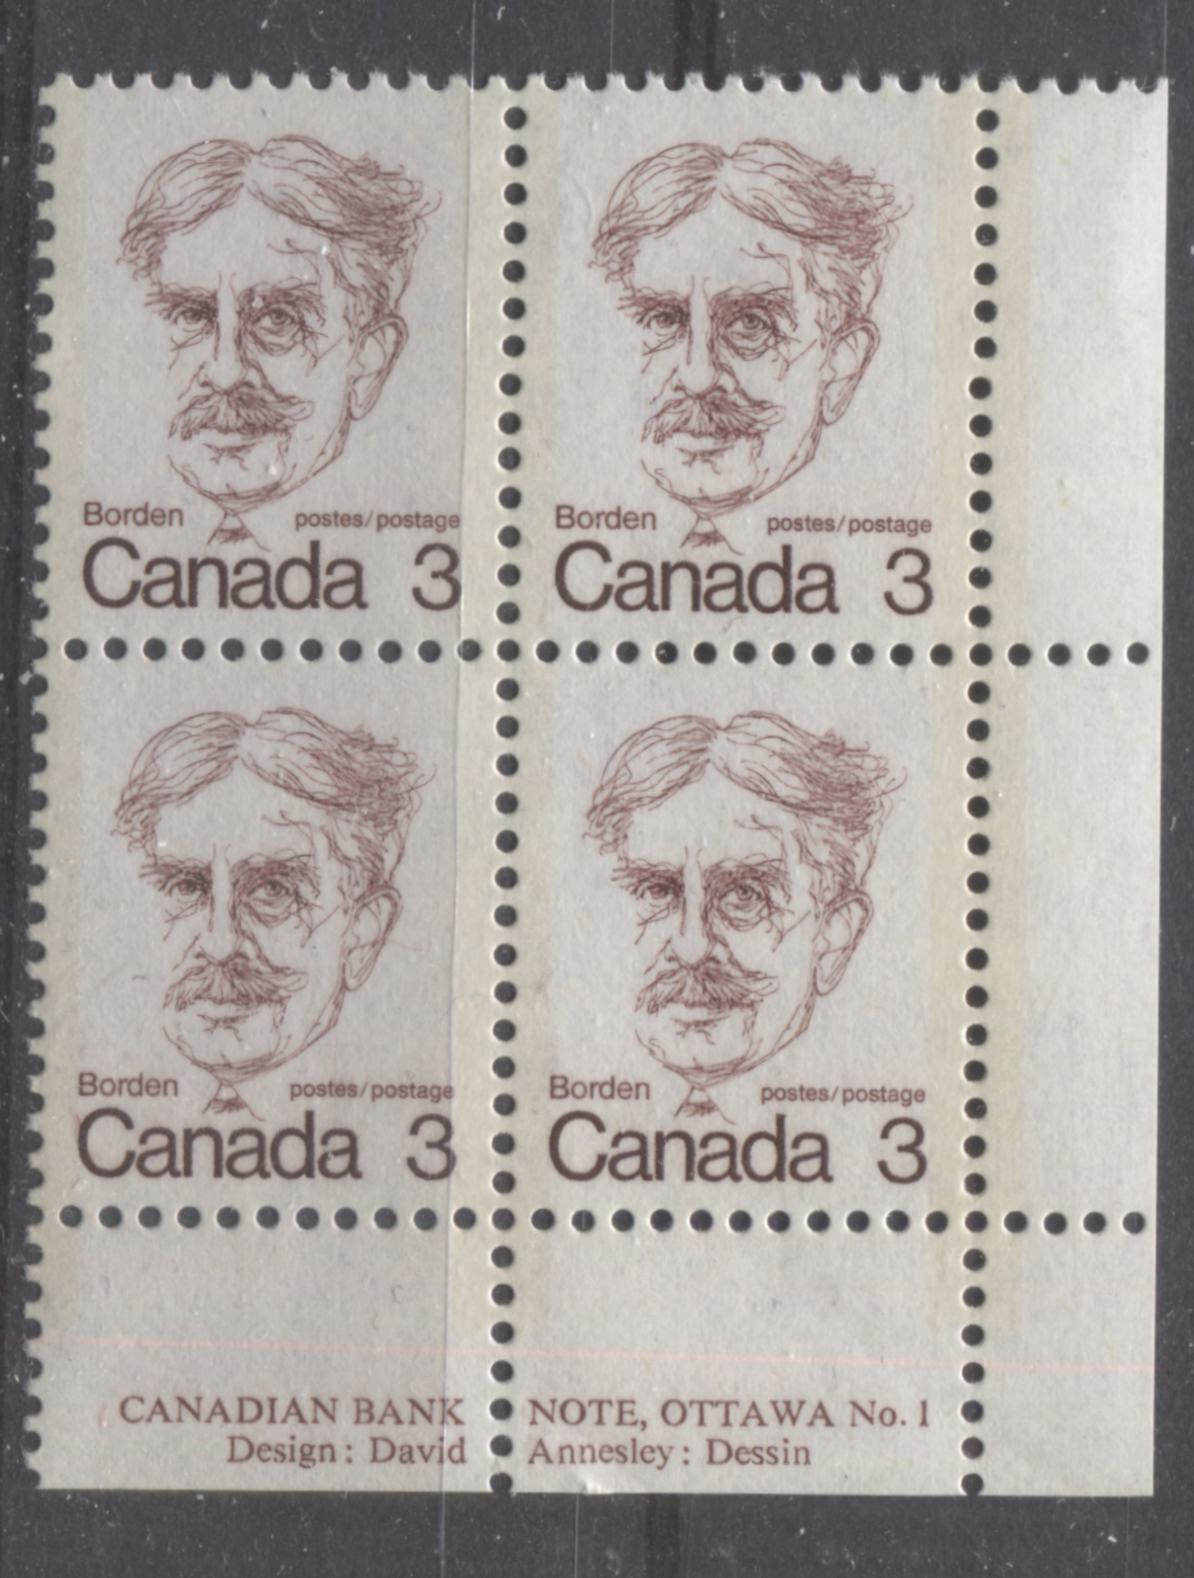
This week I examine the perforations that were used on the stamps of this issue. There were six perforations employed on the stamps of this issue as it relates to measurement, and more when you consider the way in which the sheets themselves were perforated. The five perforations are:

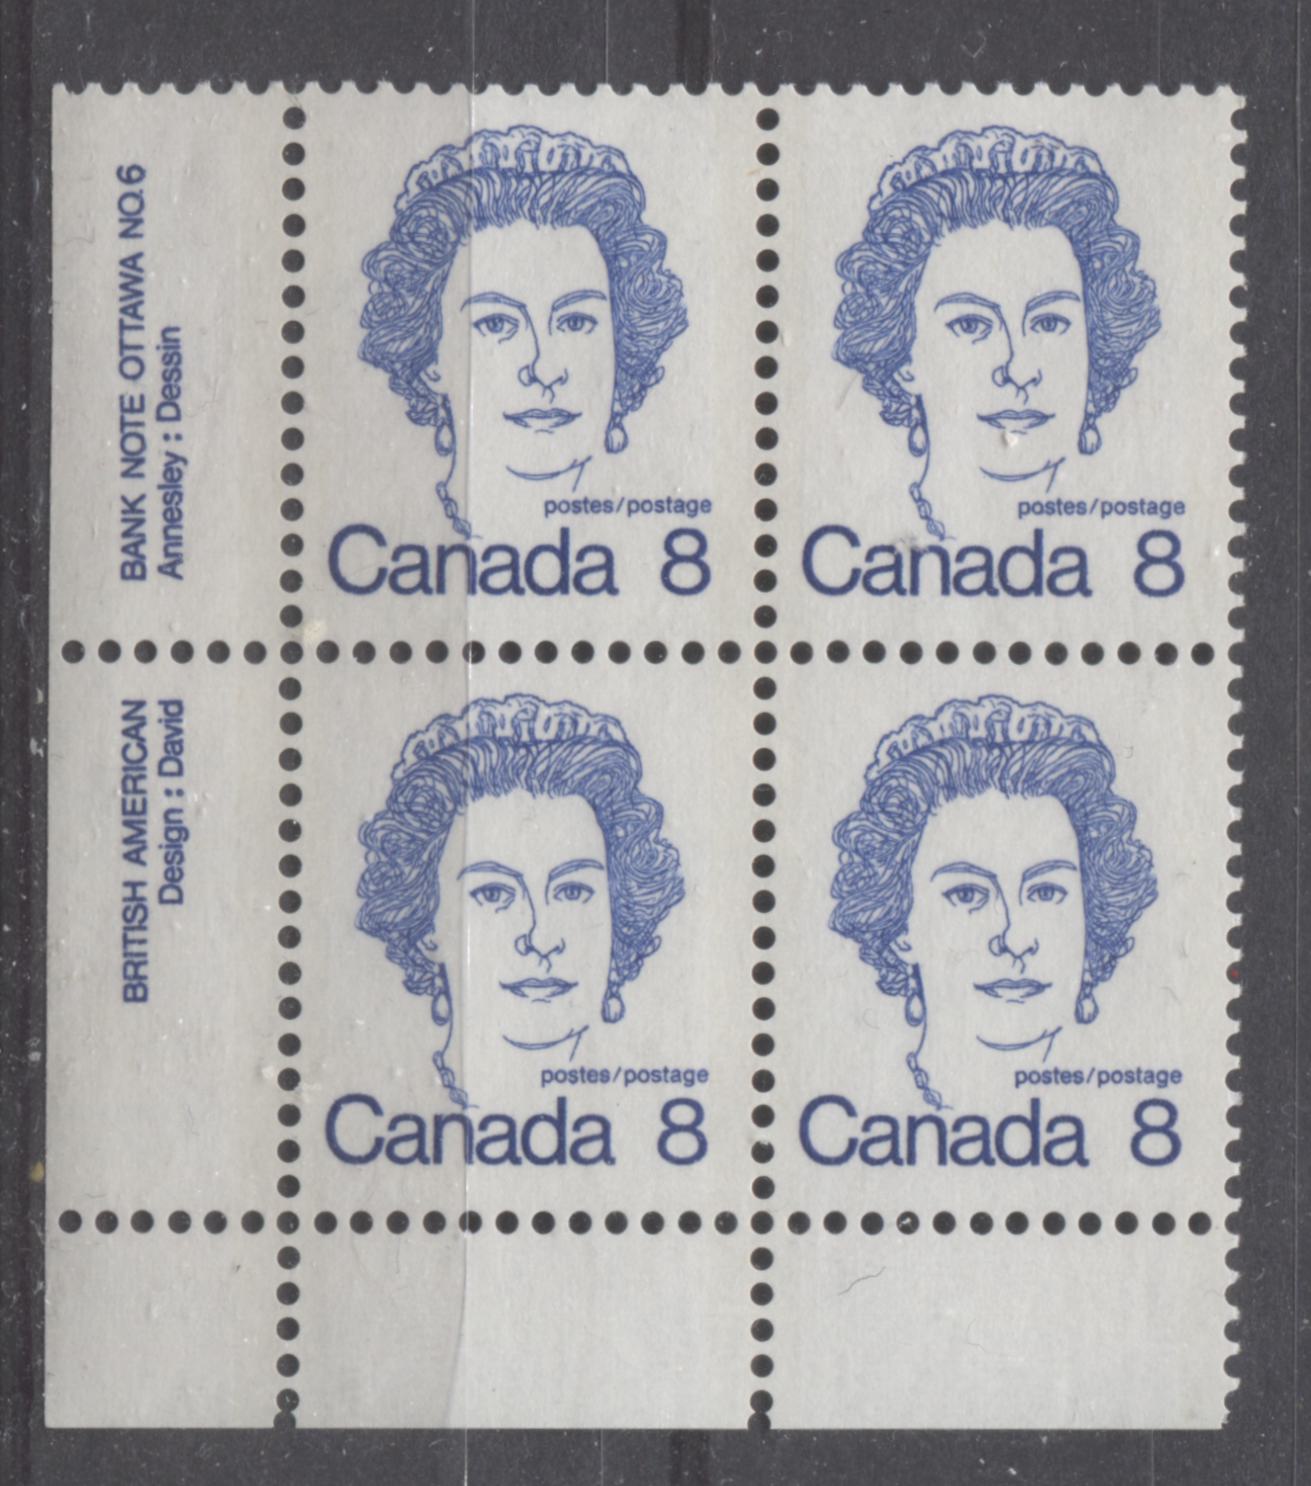
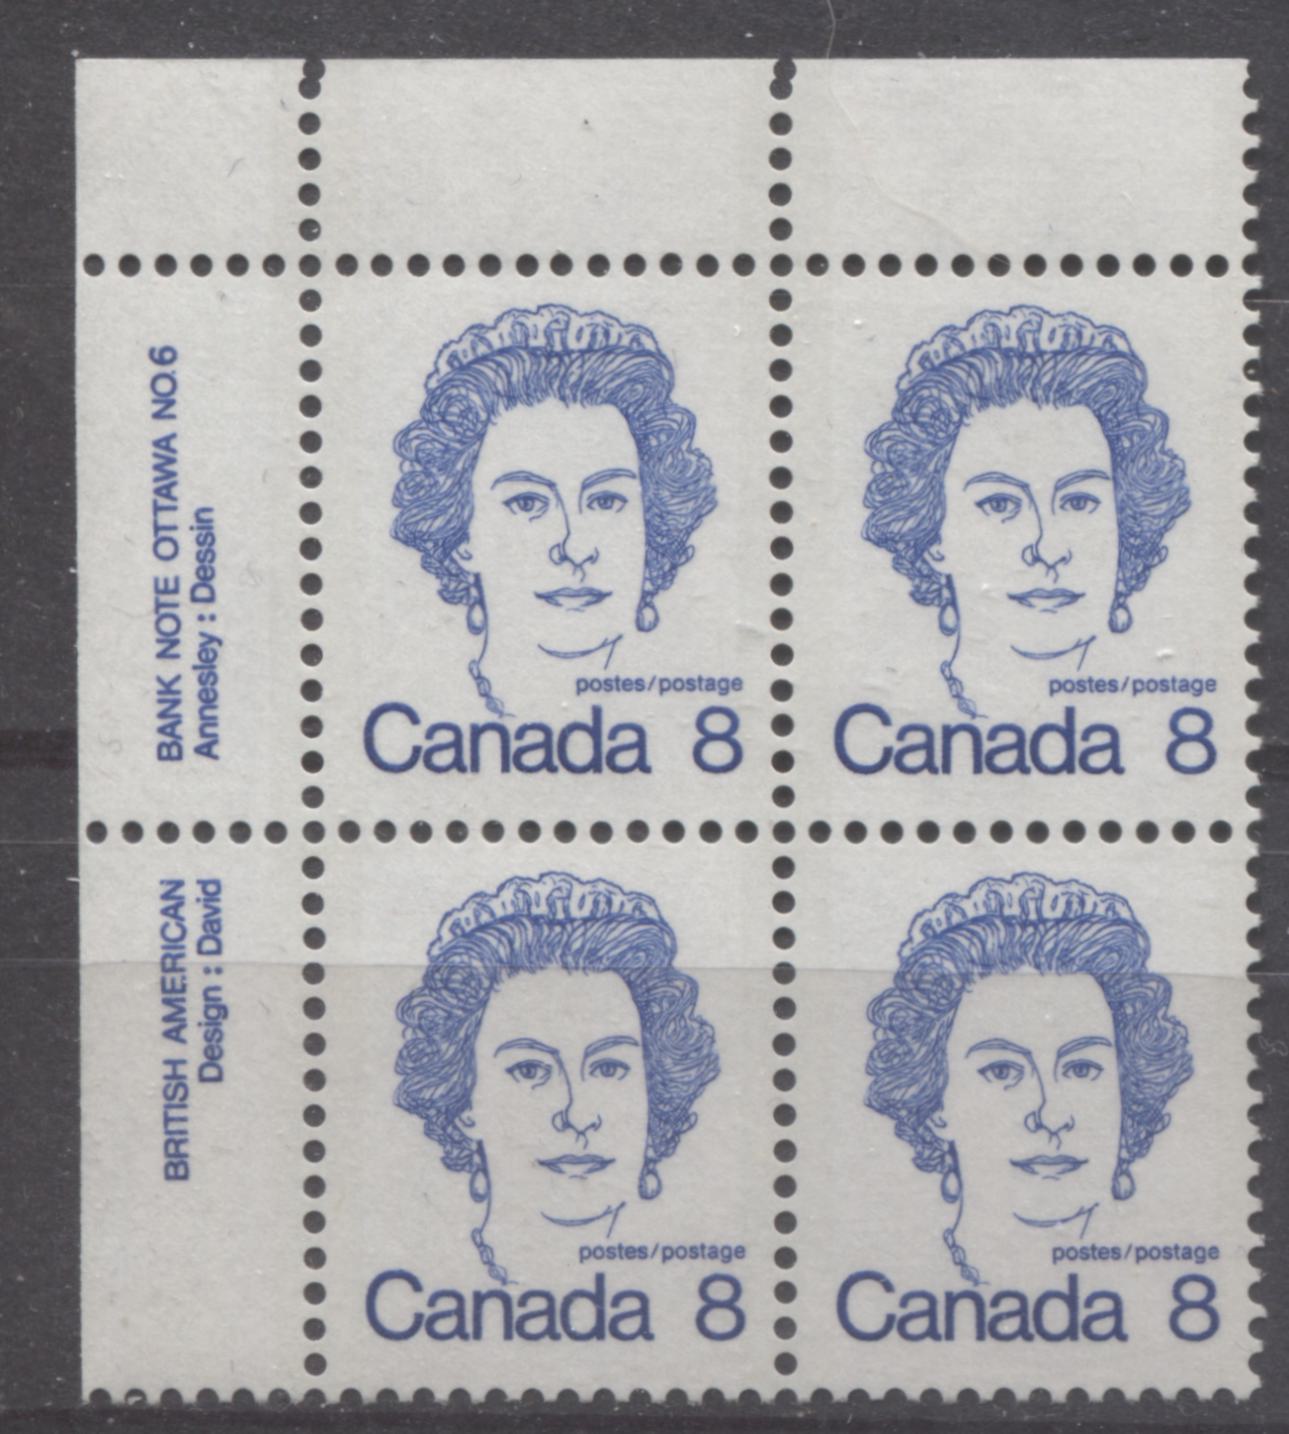
1. Comb 12 x 12.5, which was used on all the low value stamps printed by CBN and BABN, except for the plate 6 printings of the 8c and the sheet stamps of the 10c Queen.

2. Comb 13 x 13.3, which was used on the plate 6 printings of the 8c Queen and the 10c Queen sheet stamps.

3. Line 10, which was used on the coil stamps.

4. Line 11, which was used on the Ashton Potter/BABN printings of the $1 and $2.

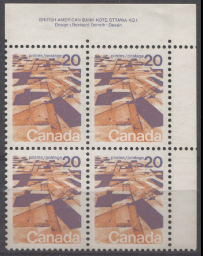
5. Comb 12.5 x 12, which was used for the pre-1976 printings of the medium value landscapes and the BABN printing of the $1 Vancouver, that was issued in 1973.

6. Comb 13.3, which was used for the last printings of the medium value landscapes and the $1 Vancouver.

What is significant about the perforations of this issue is that rather than being predominantly line perforations, most of them are comb perforations. Indeed, this was the first time that CBN had printed stamps using this new perforating technique, and they experienced some difficulties before they ultimately got it right. Another significant point is that these perforation measurements are all exact. You will not find the kind of consistent variation with these perforations that you could expect to find on the Centennial issue, or the commemorative stamps issued prior to 1972.

Another aspect that is interesting is that there were different configurations of the perforations as they related to the sheets, which you can see if you study the appearance of the selvage on plate blocks and field stock blocks. Previously, most all line perforated stamps had the selvage perforated through on all sides of the sheet, as one would expect, because the perforating was done using a drum that contained the perforating pins, and which rotated up and down the sheet. With comb perforating, the perforating pins are pre-arranged in a comb pattern, which acts like a guillotine, and then the shearing action of this comb perforates the stamps. More than one strike of the comb perforator may be required where the sheets are larger than the comb. Ordinarily if the alignment between strikes is perfect, it is not possible to tell how many strikes were required to perforate the sheets.

However, fortunately, the alignment between strikes was not perfect, and if you know what to look for, you an see how many strikes were required to perforate a sheet. On some stamps, the selvage was perforated through, whereas on other stamps, the selvage was only partially perforated through, having just one perforation hole extending beyond the horizontal or vertical perforations. The remainder of this post will examine each of these perforations and discusses some of the variations that can be found, as well as how many strikes of the comb perforator was used to perforate the sheets, and finally what the arrangement of sheets in the print layout was likely to be.

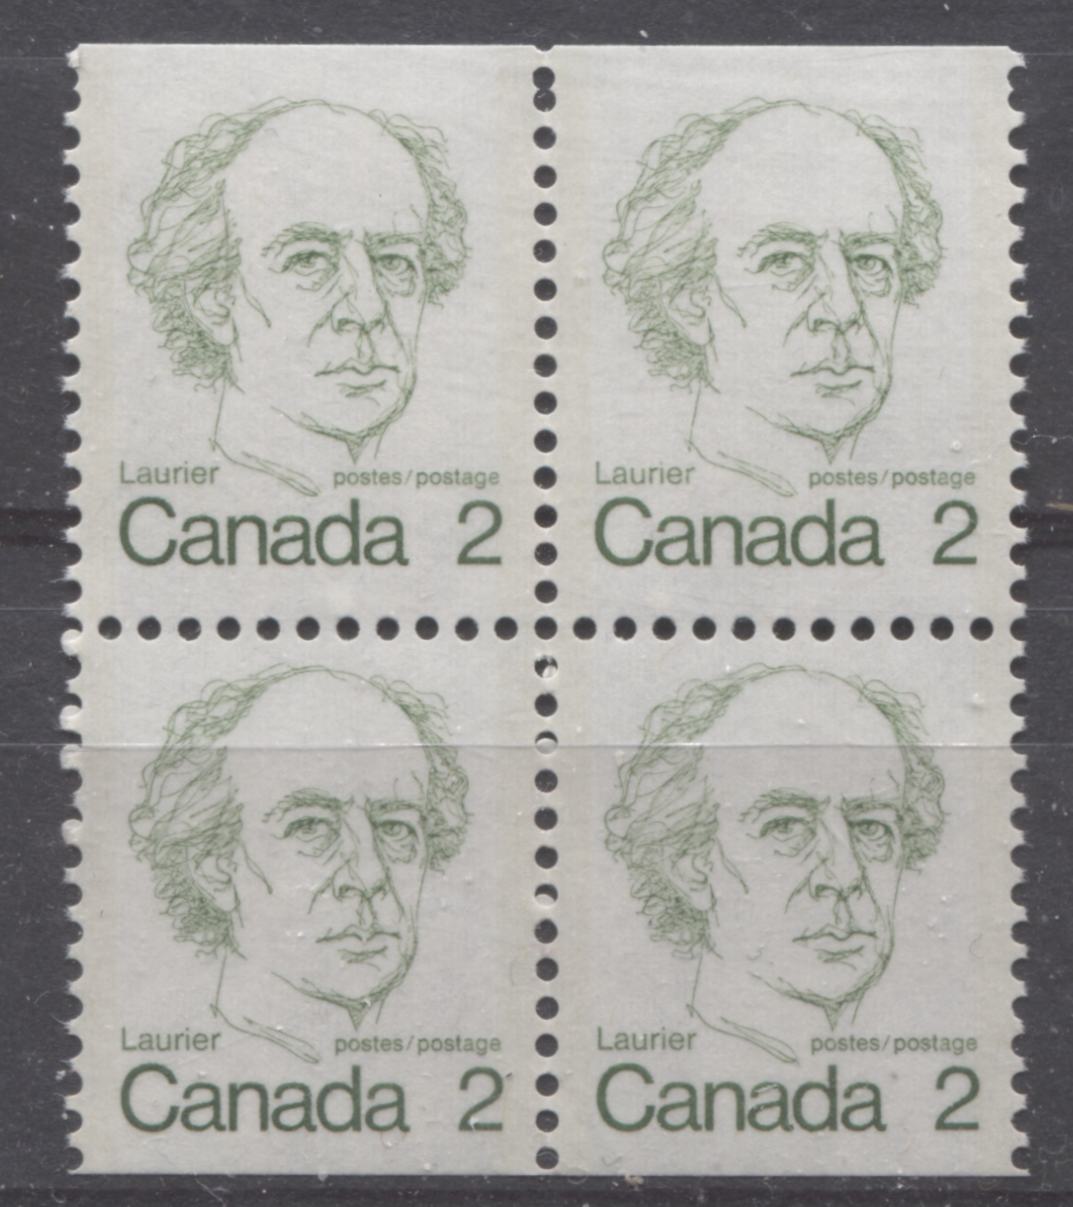
The 12 x 12.5 Comb Perforation


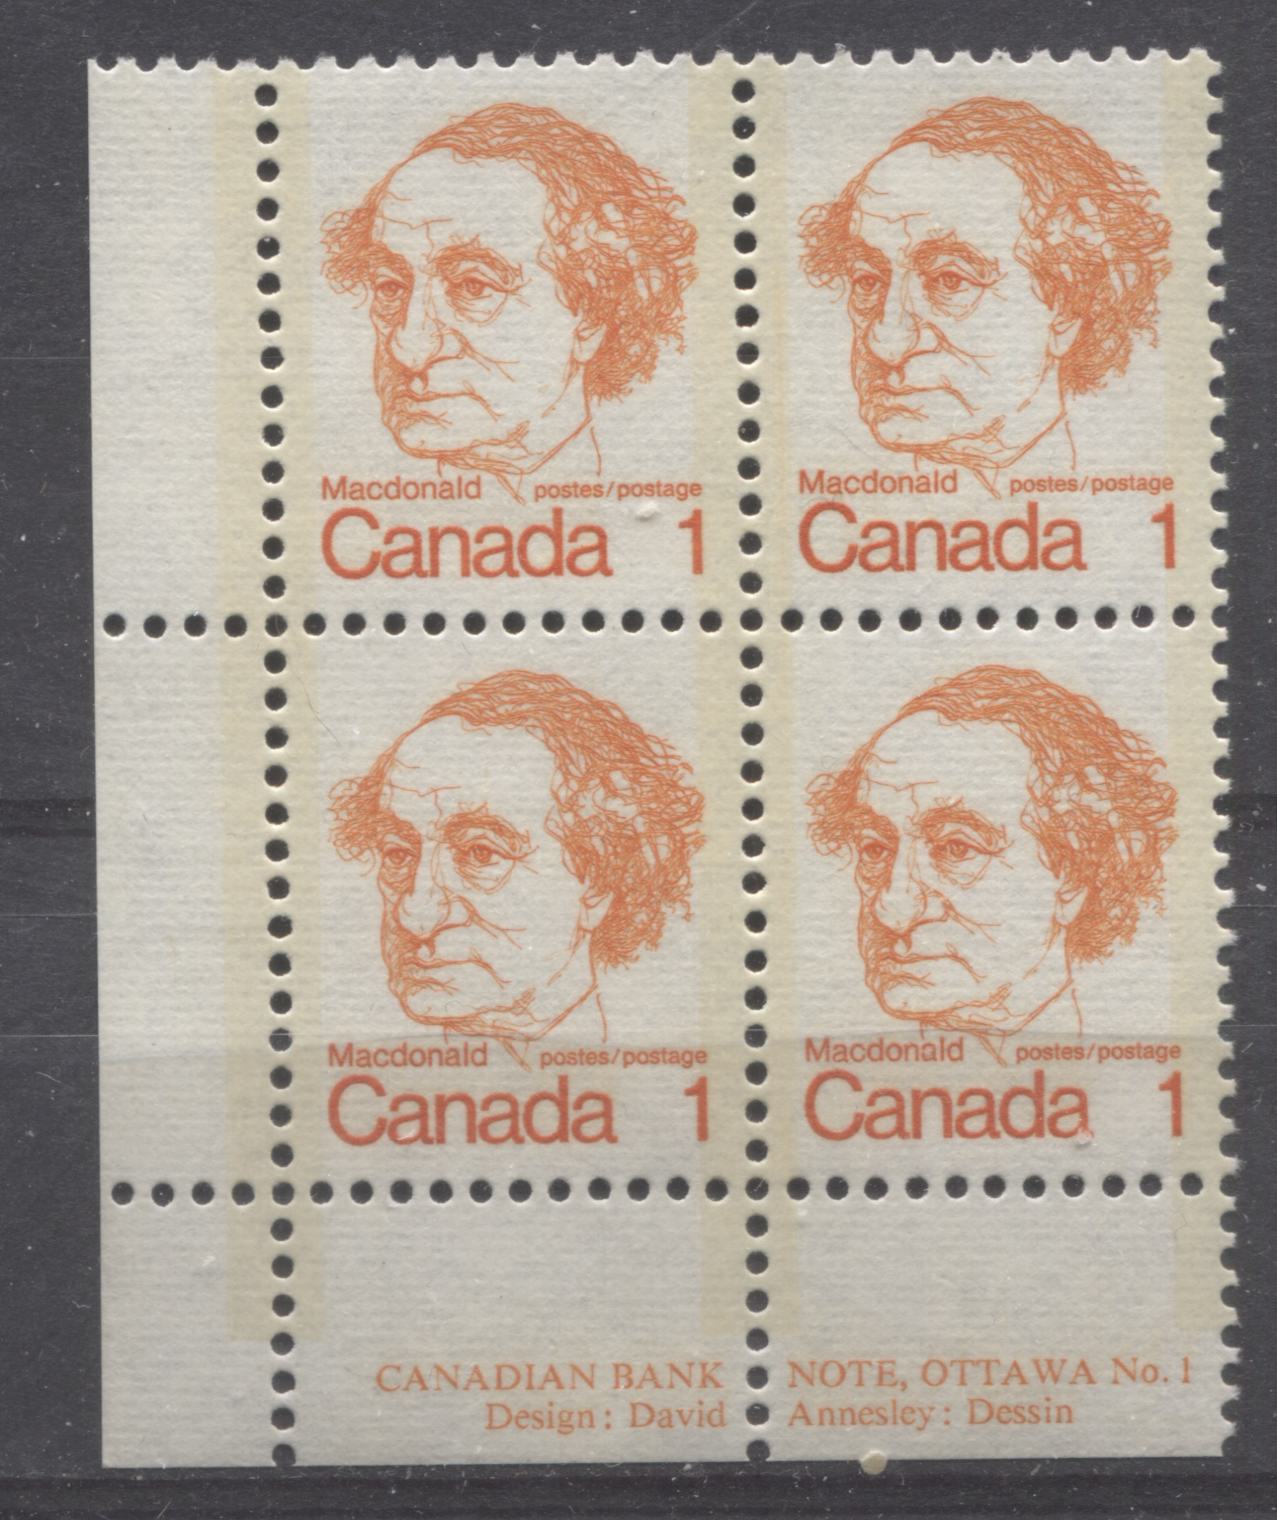
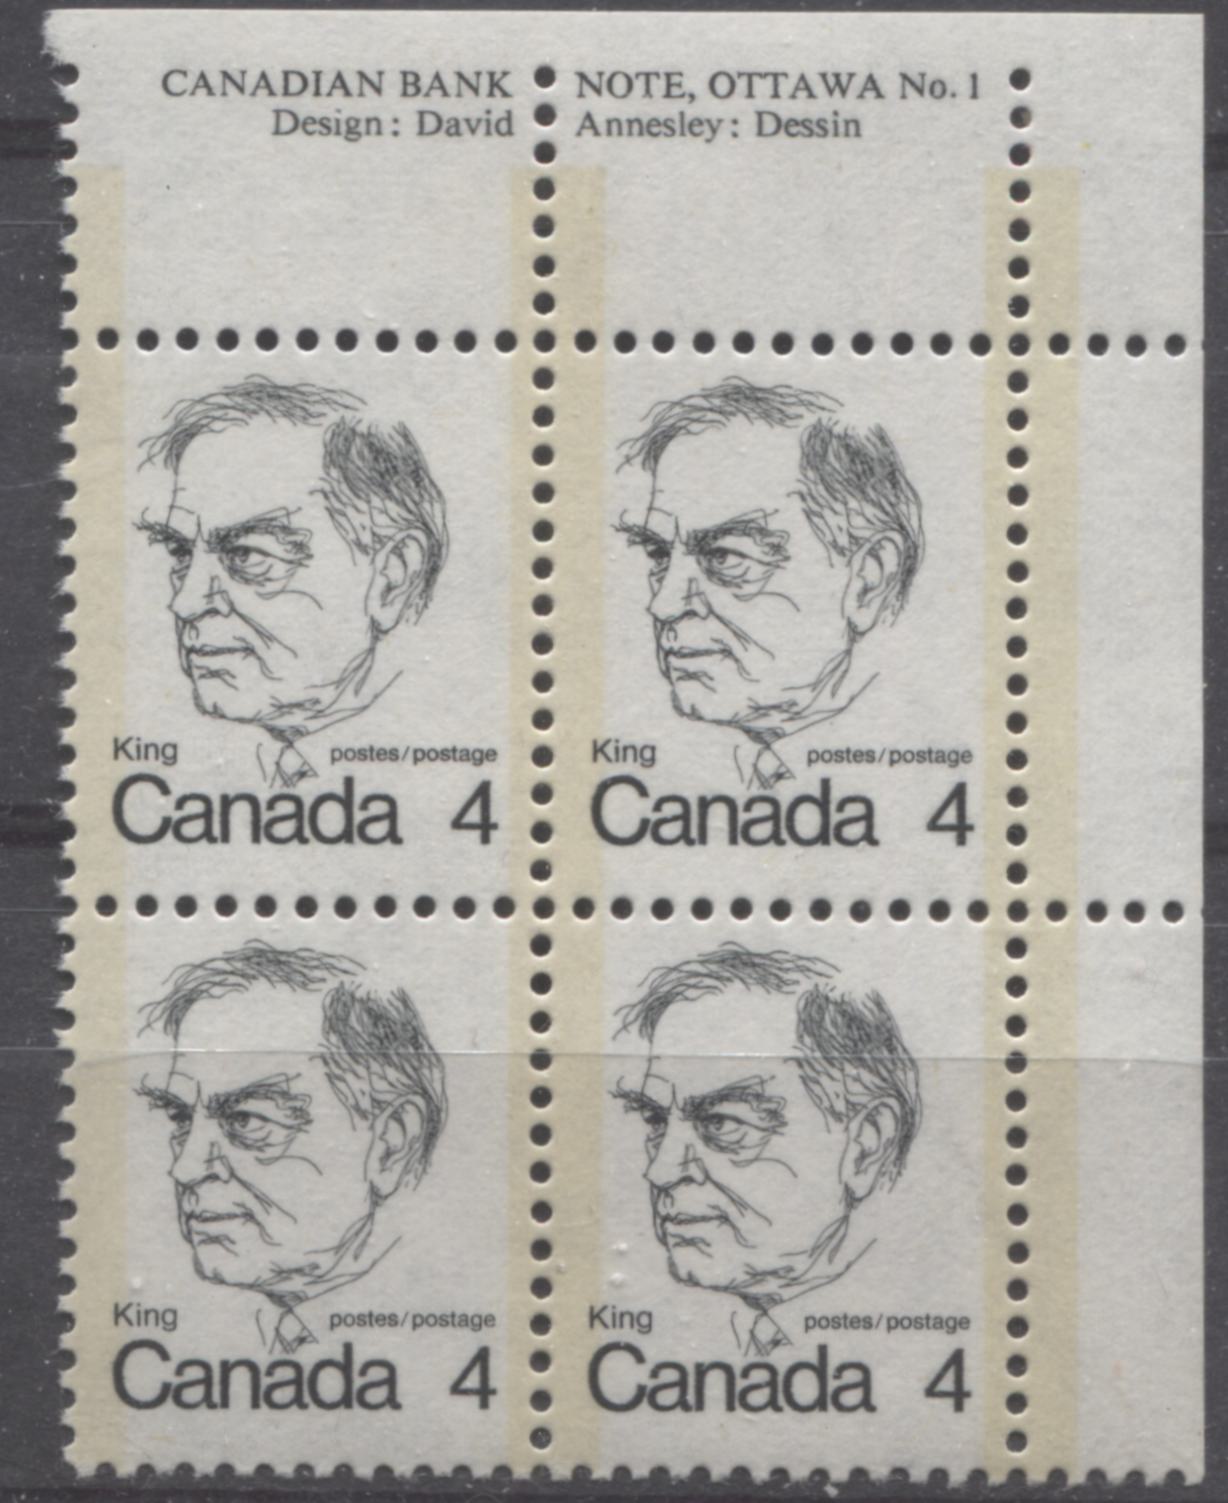
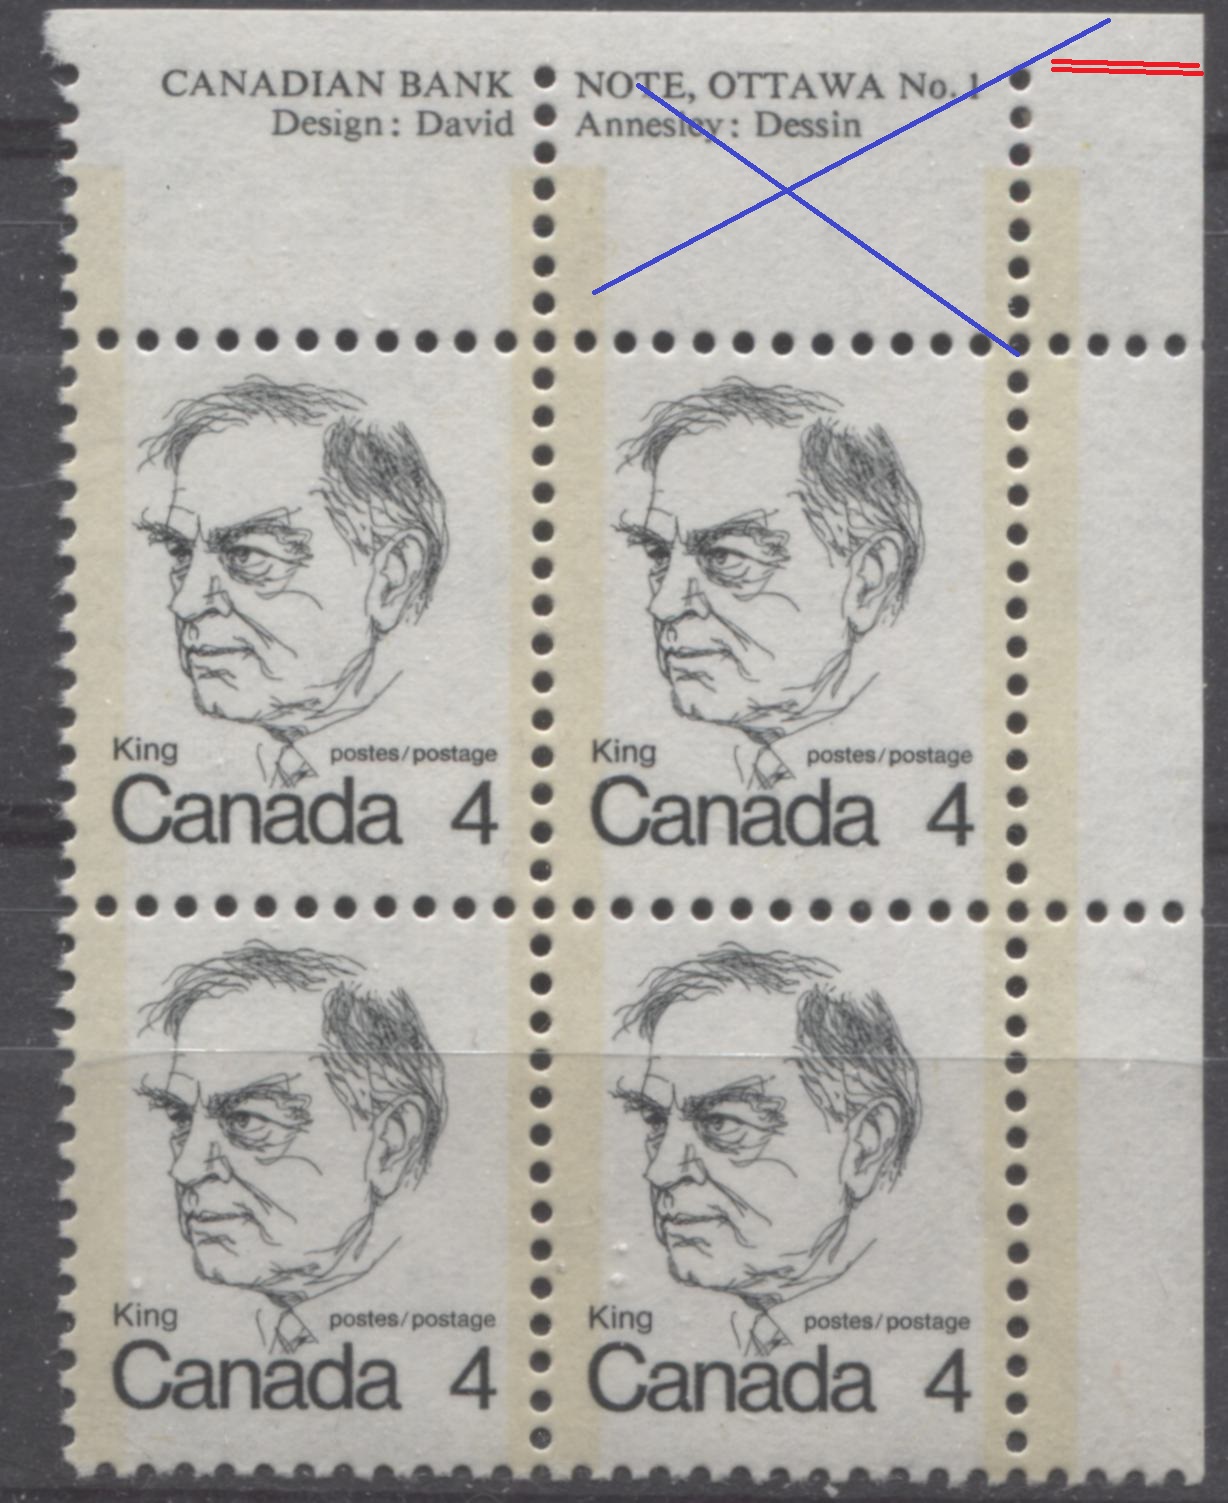
The above block is a typical plate block of one of the low value stamps printed by the CBN. As you can see the selvage was fully perforated through on both sides. However, this was based on a specific width for the selvage tabs. You can often find blocks in which the selvage is missing 1 or 2 perforation holes to be fully perforated through. If you measure the width of the selvage tabs for these blocks, you will invariably find that they are wider than usual, which is why the selvage is not perforated fully through. The pictures below show examples of blocks in which the top or bottom selvage is not quite perforated through, and others where it is the side selvage that is so affected:


Here you can see that the top selvage is almost perforated through, missing only 2 perforation holes.


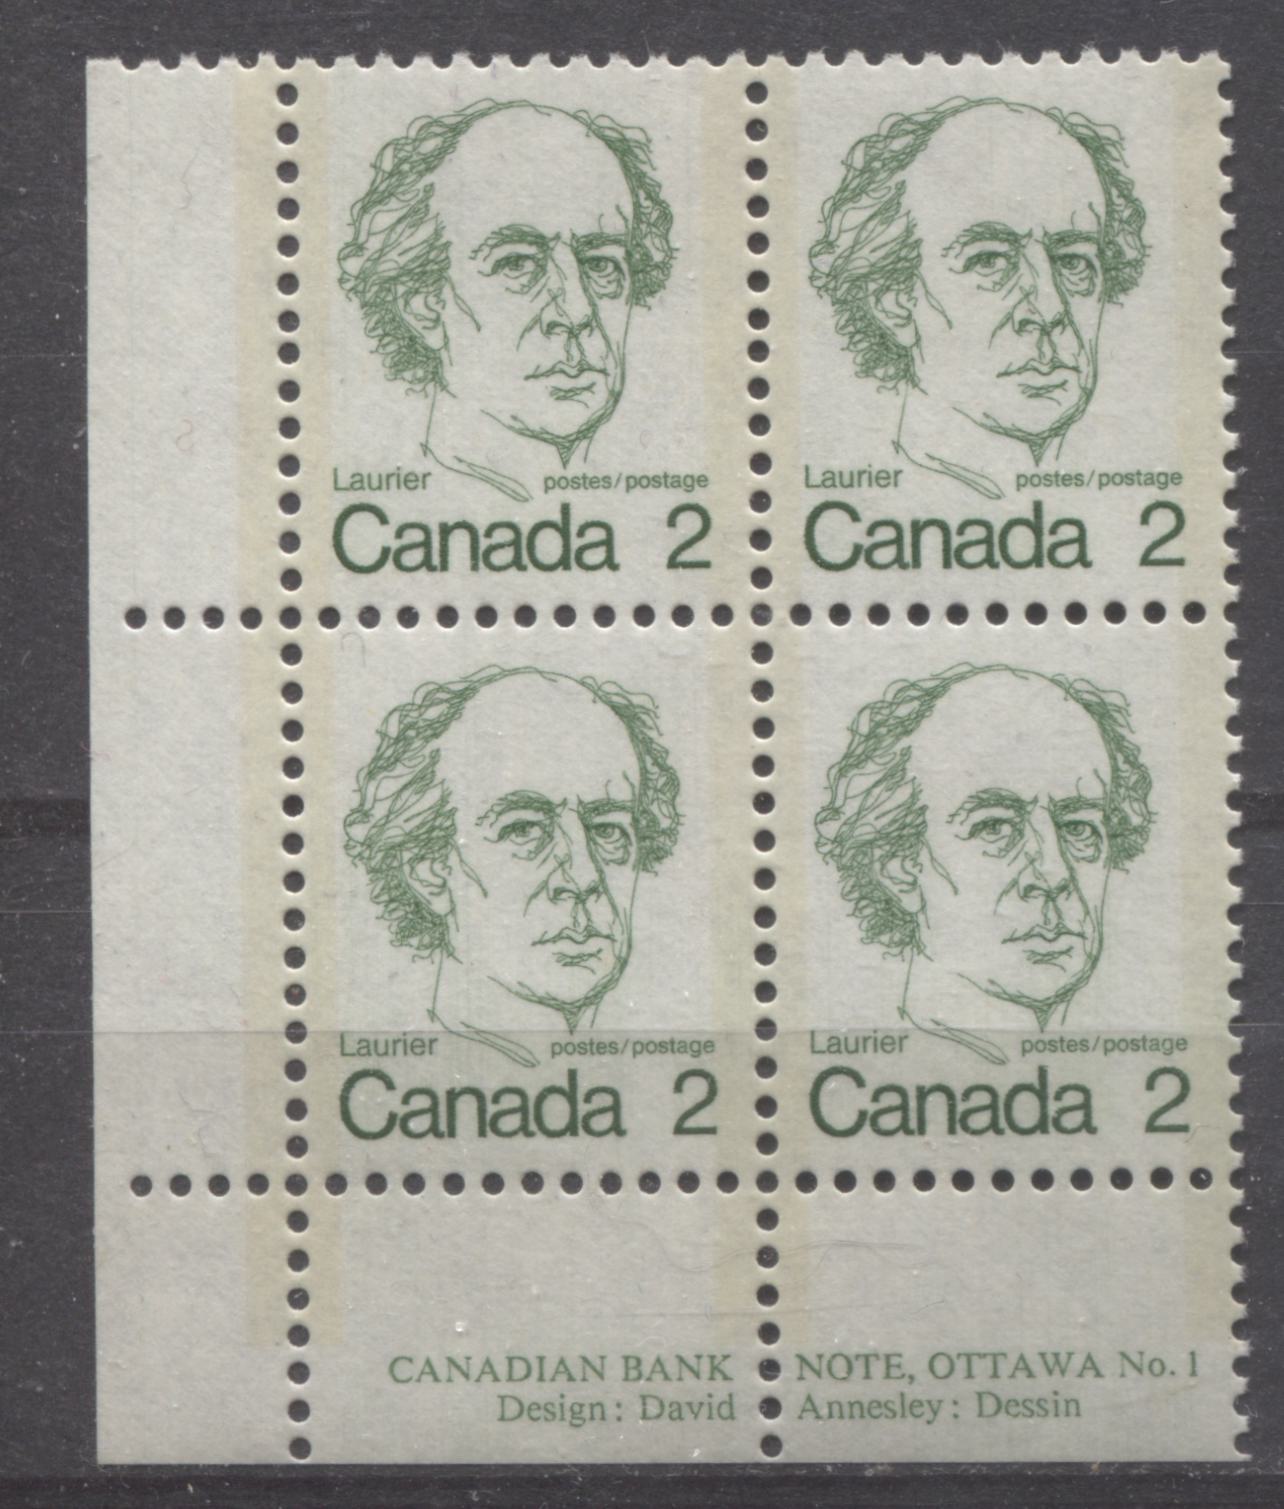
Here is an example of the lower left plate 1 block of the 2c Laurier which has left selvage that is perforated through except for the last perforation holes.

If you look carefully at these blocks you will see that the horizontal and vertical perforations are perfectly aligned, so that it appears as though the entire sheet is perforated with one single strike of the comb perforator. It is possible that some printings were perforated in this way, but what is far more likely is that 3 strikes of the perforator were required to perforate each sheet. If you look carefully at some sheets, you will see 2 spots where the vertical perforations do not quite line up: one near the top of the sheet and one near the bottom. This suggests three strikes were required and that the first and third strikes would have partially perforated the sheets above and below a sheet. The existence of side selvage that is not quite perforated all the way through suggests that the printing layour would have consisted of a rectangular or square arrangement of panes. The pictures below show two plate blocks that exhibit misalignment of perforations where one strike of the perforator ends and the other begins:


On this block look at the vertical perforations mid-way up the top stamps. You should be able to see a slight misalignment from where the bottom strike of the comb perforator ends and the top one begins.


Here we can see a block of 4 stamps from a booklet pane. At the very top of the block you can see double punching of perforations, which indicates that there were two strikes of the comb perforator. In all likelihood, the panes were arranged in large sheets, but further study would be necessary to establish the exact layout of the booklet panes.

In addition to the problems that CBN experienced with alignment of the perforations there are also instances in which unusual shaped perforations can be found - most likely the result of double punching of the perforations. The scan below shows an unusual elliptical perforation that I found on the lower rows of a sheet of 1c Macdonald stamps:


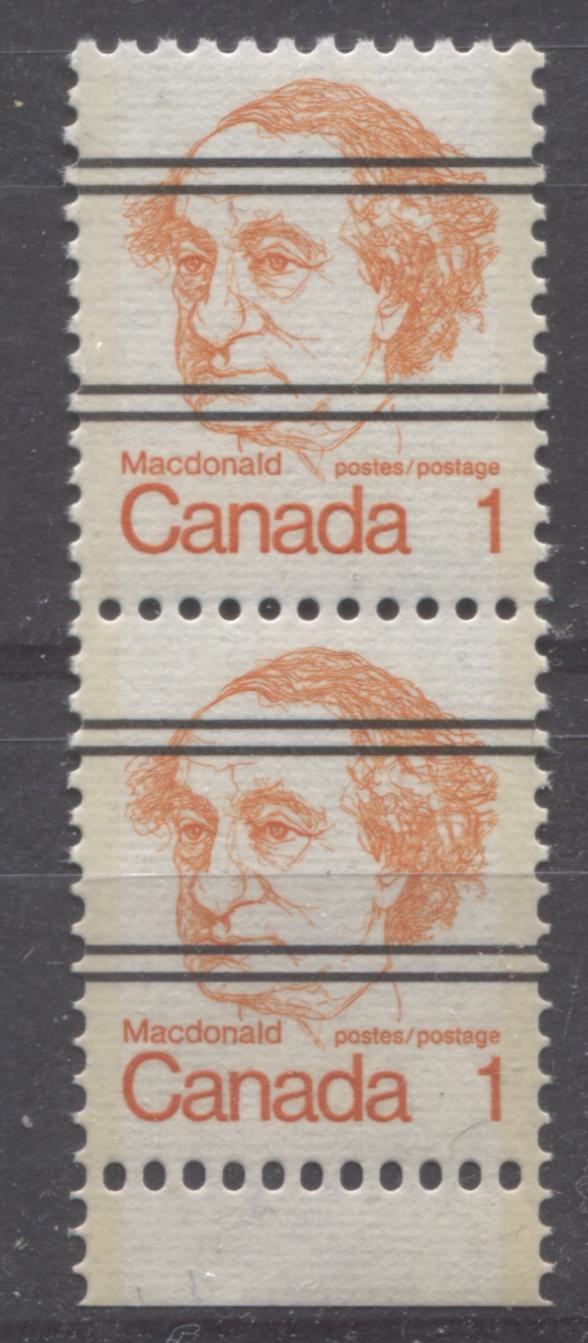
Look at how sharp and narrow those perforations become half way down the stamp. The perforations have an elliptical shape, rather than being round.

The BABN printings of the 7c St. Laurent and 8c Queen had the top and bottom selvage of the sheets perforated through, while the side selvage is imperforate, except for one single extension hole, as shown below:


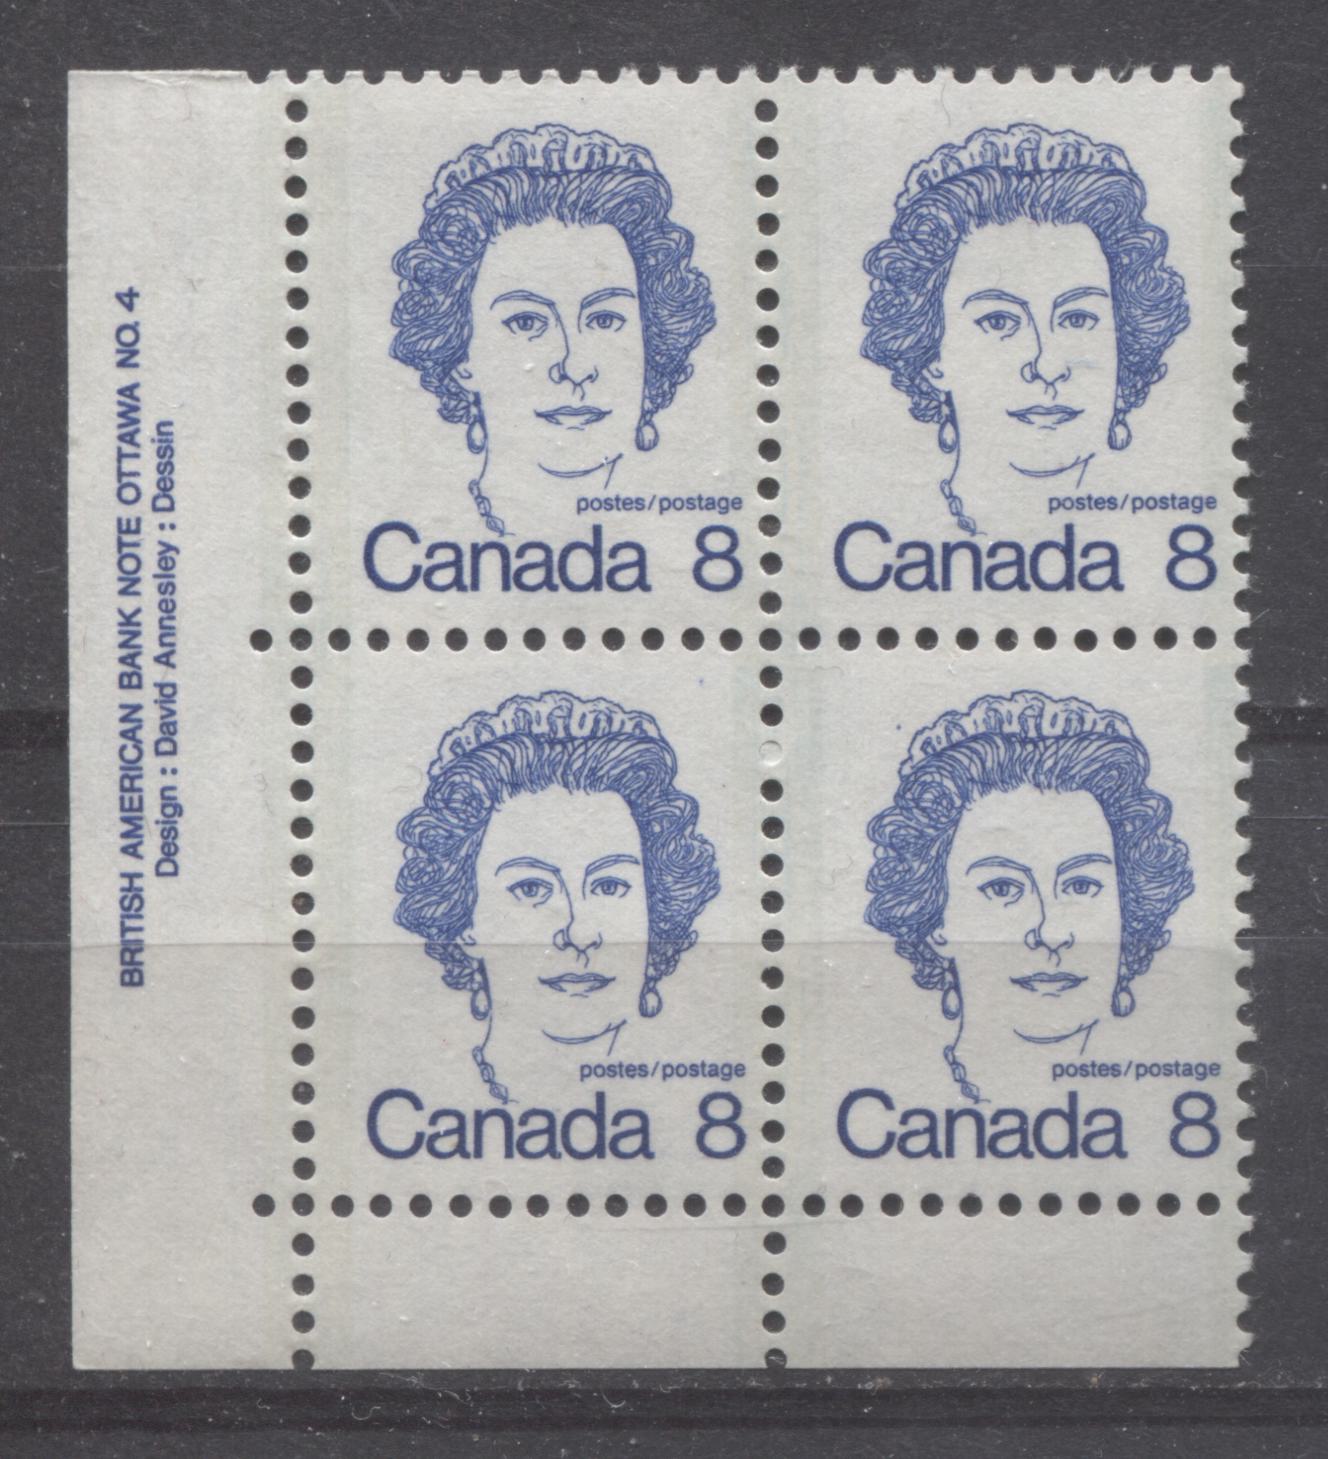
On this block, the alignment of the perforations is such that it appears to have been perforated by a single comb strike. Generally the sheets appear to have been perforated by a single comb strike on these stamps, but the comb only extended slightly into the top or bottom selvage of many blocks, and on many blocks you can see two distinct strikes of the comb perforator, as shown in the scans below:


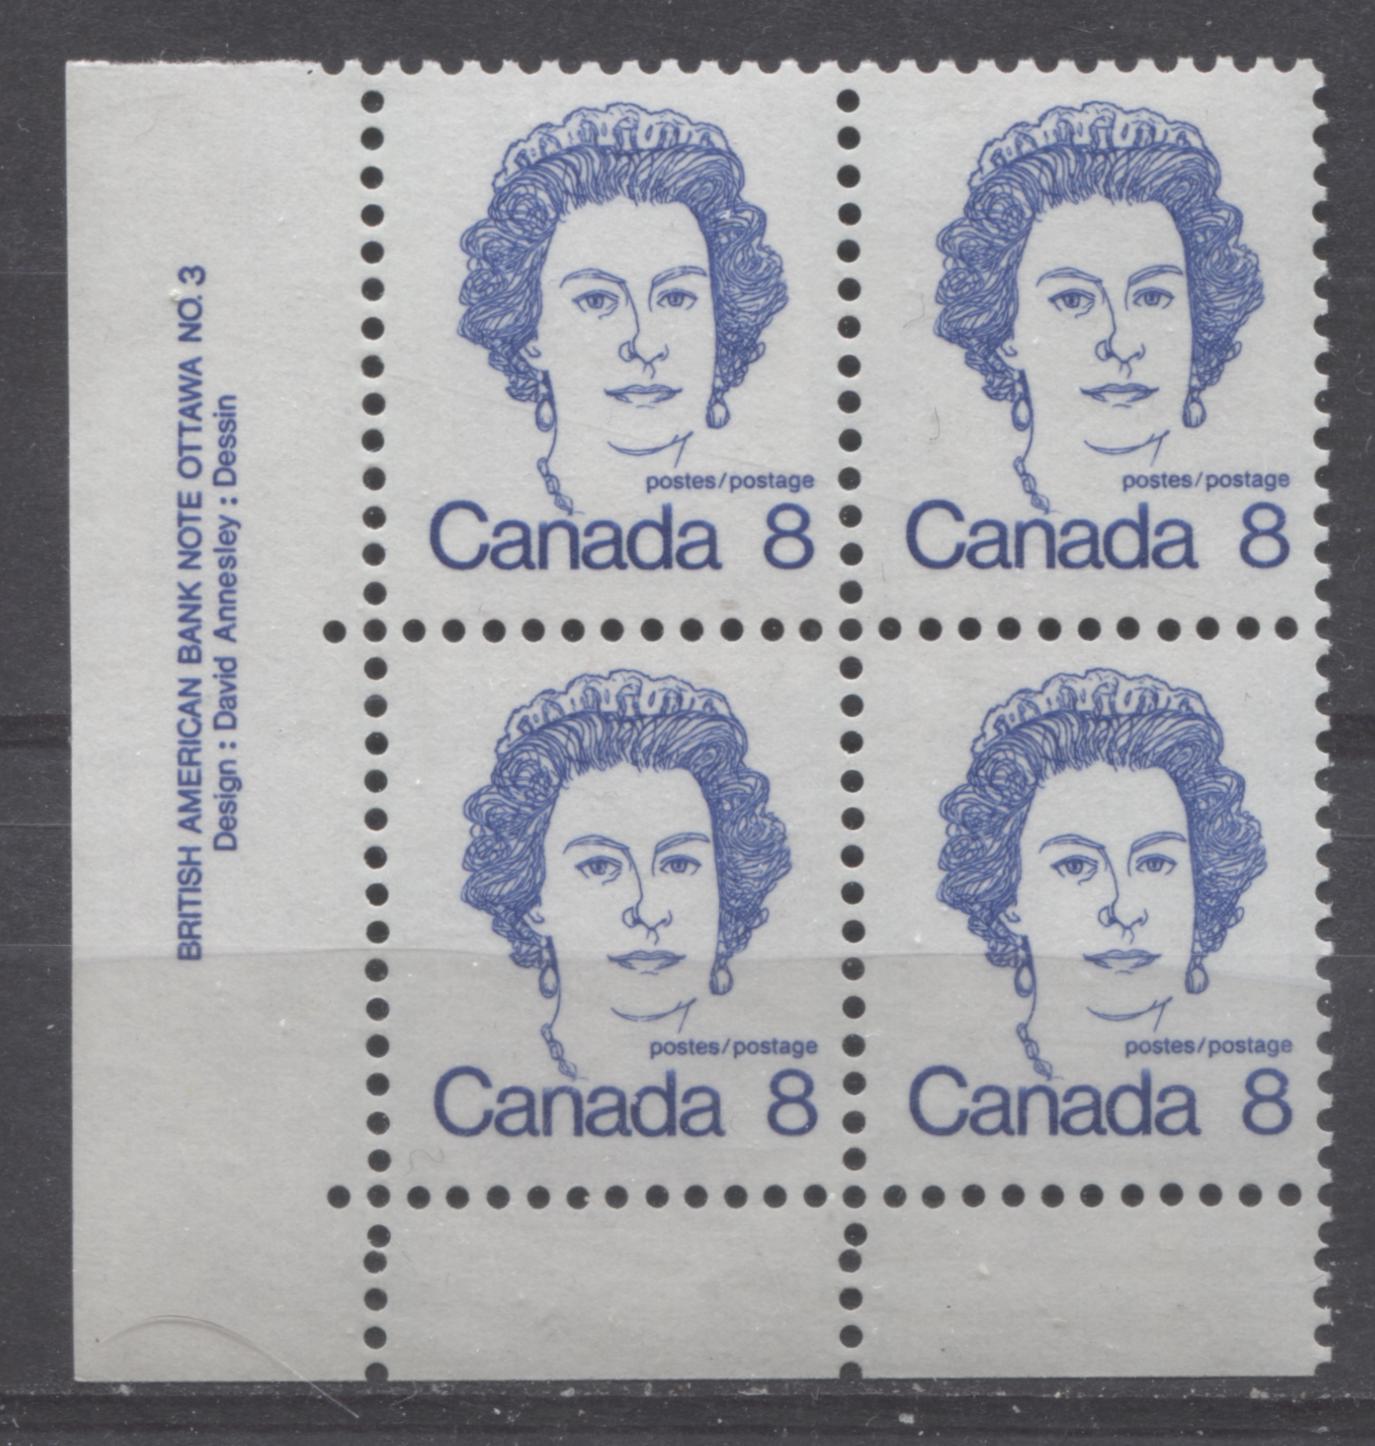
Here you can see two clear strikes of the comb perforator in the bottom selvage of the above block. This arrangement of perforation tends to suggest that the panes were arranged vertically in the print layout.

The 12.5 x 12 Comb Perforation

This perforation is found on the type 1 and first type 2 printings of the 10c through 50c values, as well as the first printings of the BABN printings of the $1 Vancouver. Generally on the 10c-$1 values, the side selvage is perforated through, while the top and bottom selvage shows only a single extension hole in the top or bottom selvage. This suggests a horizontal arrangement of the panes in the print arrangement.

On some blocks it is possible to see two comb strikes in the side selvage. The scans below show the typical appearance of these blocks:


This block likely comes from the right hand end of the print run, as there are no double strikes of the comb perforator.


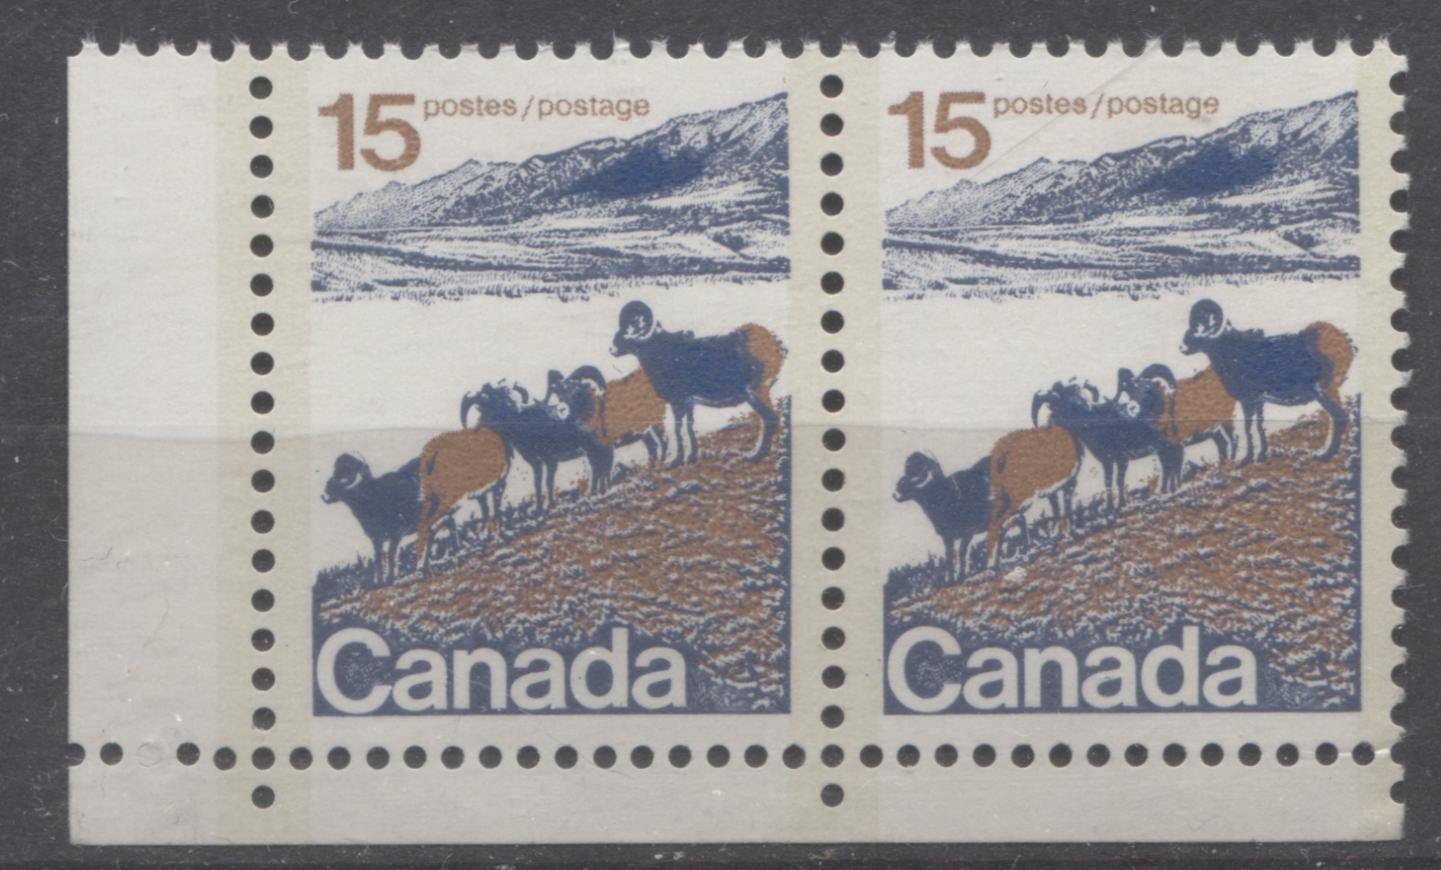
If you look carefully at the type 2 pair of the 15c mountain sheep shown above, you can see a slight mis-alignment of the horizontal perforations in the left selvage tab. This suggests that there were two comb strikes and that this comes from one of the middle panes in the print run.

The 13 x 13.3 Comb Perforation

This perforation is only found on two stamps, being the 10c Queen sheet stamps and the 8c Queen sheet stamps from plate 6. In all cases, the selvage is perforated through on all sides. However, double strikes of the perforator can often be seen at the top and bottom of selected blocks. This suggests a vertical arrangement of the panes in the print layout.


Here you can just make out a second comb strike at the very bottom of the block.


Here, you can see a similar double comb strike, this time at the top of the block.

The 10 Line Perforation


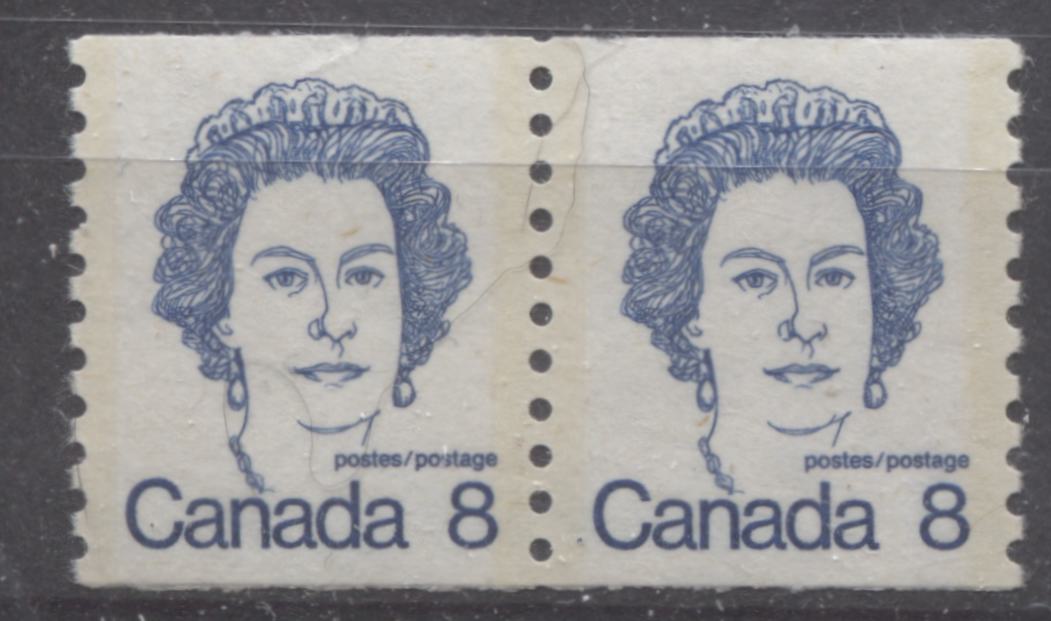
This perforation was used only for the coil stamps. These coils were produced in large sheets that were line perforated, rolled up and scored between the rolls. I am positing that this was a line perforation from the fact that the earlier Centennial coils used the same line perforation, and I have never seen any mis-alignment of the vertical perforations in a pair, or large block.

The 11 Line Perforation


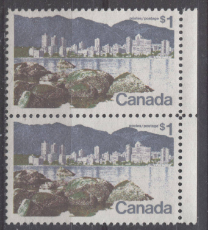
Given that this perforation is only found on other stamps printed by Ashton Potter, I am going to go ahead and guess that this is their perforation job, which explains why it is only found on the $1 and $2 values printed by them. You can clearly see in the above scan that it is indeed a line, rather than comb perforation. Also, the top and bottom and side selvage of all blocks is fully perforated through, as one would expect.

The 13.3 Comb Perforation


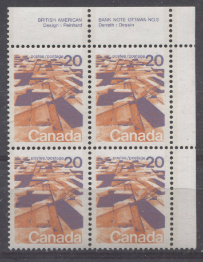
This perforation is only found on the last printings of the 10c-$1 values. Generally, the selvage of the sheets is fully perforated through, except for some printings of the 50c and all printings of the $1. On these, the side selvage is fully perforated and the upper and lower selvage shows only a single extension hole, suggesting a horizontal arrangement of the panes. On the other values, I have noticed double perforation strikes in the side margins, but never the top or bottom. Similarly, I have come across blocks that are not quite perforated through on the top or bottom, for the same reasons as the low values. Again, this suggests a horizontal arrangement of the panes in the print layout.

So there you have it. A seemingly simple topic which is actually more complicated than first appears. Next week I am going to look at the tagging found on these stamps.


Send note to Staff  Go to Top of Page
Pillar Of The Community
Canada
5821 Posts
Posted 02/05/2019   8:50 pm  Show Profile Bookmark this reply Add lithograving to your friends list  Get a Link to this Reply
Thanks Brixtonchrome for another great post this time regarding
perforations.

I do have a query though where you write that BABN
used Comb perforation.

In the The Goebel Press Era of Canadian Stamps there is
mention of a double platen system.


To perforate the stamps on the web, the Goebel press used a double platen system. A lower female platen was precisely drilled with all the necessary holes. The upper platen contained the perforating pins, held in position according to the stamp being printed.

The platens moved together with the printed web in between. While travelling at the exact speed of the web, the upper platen drops and rises, perforating the 2 pane by 100 stamp layout for the small size definitives (the layout was 2 by 50 for the double size commemoratives) in one action. Then the platens accelerated to the press speed again to complete the next block perforation, and on and on. The register, like all printing units, was controlled by print marks checked by "electric eyes".


This sounds more like a harrow type of perforator or a box
type of perforation not comb.
Send note to Staff  Go to Top of Page
Rest in Peace
Netherlands
963 Posts
Posted 02/06/2019   11:46 am  Show Profile Bookmark this reply Add Galeoptix to your friends list  Get a Link to this Reply
Chris and Martin,

it is probably more complicated!

A harrow perforator is designed to perforate a complete sheet or pane.

What I have noticed in the sheets printed by the CBN is that the comb perforator is in fact a H-shaped comb!

Counting from the top the distance between the 7th hole and the 8th hole can vary! I have seen this for several Caricature stamps!

Rein
Send note to Staff  Go to Top of Page
Rest in Peace
Netherlands
963 Posts
Posted 02/06/2019   11:54 am  Show Profile Bookmark this reply Add Galeoptix to your friends list  Get a Link to this Reply

Quote:


Here you can see that the top selvage is almost perforated through, missing only 2 perforation holes.


Chris,

NO, it is NOT missing! It shows what I wrote in my last posting. The H-shaped perforator has 7 holes above and 7 holes below the base line!


Rein
Send note to Staff  Go to Top of Page
Edited by Galeoptix - 02/06/2019 11:57 am
Rest in Peace
Netherlands
963 Posts
Posted 02/06/2019   12:03 pm  Show Profile Bookmark this reply Add Galeoptix to your friends list  Get a Link to this Reply


H-shaped perforator with 14 holes above and 14 holes below the base line [BABN].
Send note to Staff  Go to Top of Page
Rest in Peace
Netherlands
963 Posts
Posted 02/06/2019   12:06 pm  Show Profile Bookmark this reply Add Galeoptix to your friends list  Get a Link to this Reply


H-shaped perforator with 10 holes above and 5 holes below the base line [BABN].

Or upside down:

Send note to Staff  Go to Top of Page
Edited by Galeoptix - 02/06/2019 12:08 pm
Rest in Peace
Netherlands
963 Posts
Posted 02/06/2019   12:16 pm  Show Profile Bookmark this reply Add Galeoptix to your friends list  Get a Link to this Reply


Multilayer sieve structure! Introduced world-wide around 1971; earlier we had the twill-binding sieve structure which was responsible for the "ribbing" in the Centennials, Wildings etc.
Send note to Staff  Go to Top of Page
Pillar Of The Community
Canada
5821 Posts
Posted 02/06/2019   12:41 pm  Show Profile Bookmark this reply Add lithograving to your friends list  Get a Link to this Reply
Rein

When you mention this H-shaped perforator are you just
referring to CBN stamps or also BABN stamps?

You wrote:


Quote:
A harrow perforator is designed to perforate a complete sheet or pane.


The article about the BABN Goebel press states
that the upper platen drops and rises, perforating the 2 pane by 100 stamp layout for the small size definitives (the layout was 2 by 50 for the double size commemoratives) in one action.

Sounds like a harrow perforator to me.
Send note to Staff  Go to Top of Page
Rest in Peace
Netherlands
963 Posts
Posted 02/06/2019   1:49 pm  Show Profile Bookmark this reply Add Galeoptix to your friends list  Get a Link to this Reply


The H-commb 7+7 struck TWICE at the bottom margin!
Send note to Staff  Go to Top of Page
Rest in Peace
Netherlands
963 Posts
Posted 02/06/2019   2:10 pm  Show Profile Bookmark this reply Add Galeoptix to your friends list  Get a Link to this Reply

Quote:


H-shaped perforator with 10 holes above and 5 holes below the base line [BABN].

Or upside down:


Martin,

could be interpreted as a Harrow! But just 10 holes interpane bridge!?

Rein
Send note to Staff  Go to Top of Page
Pillar Of The Community
Canada
5821 Posts
Posted 02/06/2019   2:37 pm  Show Profile Bookmark this reply Add lithograving to your friends list  Get a Link to this Reply


Quote:
The H-commb 7+7 struck TWICE at the bottom margin!


OK I see that but those are CBN stamps.


Quote:
could be interpreted as a Harrow! But just 10 holes interpane bridge!?


Could be that the speed of the web slowed down for a second or
wasn't synchronized causing an overlap of perfs?


Send note to Staff  Go to Top of Page
Page: of 10 Previous TopicReplies: 139 / Views: 10,822Next Topic  
Previous Page | Next Page
 
To participate in the forum you must log in or register.

Go to Top of Page

Disclaimer: While a tremendous amount of effort goes into ensuring the accuracy of the information contained in this site, Stamp Community assumes no liability for errors. Copyright 2005 - 2026 Stamp Community Family - All rights reserved worldwide. Use of any images or content on this website without prior written permission of Stamp Community or the original lender is strictly prohibited.
Privacy Policy / Terms of Use    Advertise Here
Stamp Community Forum © 2007 - 2026 Stamp Community Forums
It took 0.23 seconds to lick this stamp. Powered By: Snitz Forums 2000 Version 3.4.05