Hi,
I hope you don't mind if a newcomer replies. With all due respect to Bob Allen at 1847usa.com, the dot you are noticing is usually called a position dot by specialists, Your stamp has two, but we will get back to that.
fig 1

First I want to show you a plate proof with your dot and the layout lines that were on it before the plate was burnished to remove them. the position dot is rather sizeable. But if you look at the left end of the area of printing, on line with the last background shading line, you will see a very tiny dot. That dot appears on the die, but the position dot does not. That dot is a true guide dot, and one was placed at each corner of the design area to guide the engraver in the limits of the design area. Usually the guide dots were removed from each of the reliefs on the transfer roll, but as you can see from this proof, sometimes they made it all the way to the plate from one corner of the design or another.
fig 2
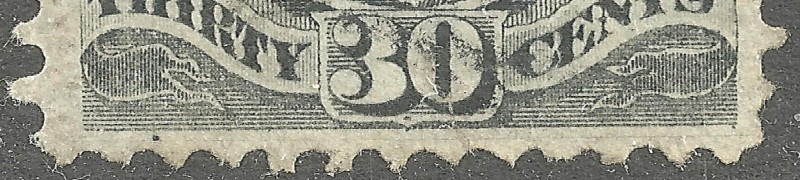
Now let's look more closely at the position dot.

These dots and their associated layout lines were positioned on the plate prior to entering the designs, as a guide to the siderographer in positioning the columns of cliches (a cliche is the individual design on the plate). Normally they appear above the top row and below the bottom row on both panes of a 200 subject plate. This second figure shows the key spot on the first two positions from a plate number and imprint strip of five. All five positions have the dot just as you see it here, and a layout line connects them all. Notice however that the dot is inset from the edge of the design, and not at a corner as you might expect.
fig 3
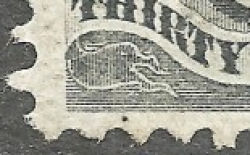
This next image should help explain why that is, and alert you to notice something on your stamp you might have missed.

It turns out that the position dots at the tops and bottoms of the plates were not the primary dots used for alignment of each cliche. The dot for that was located inside the design area, and when visible appears in the vignette frame on a line with Hamilton's lower lip. As you can see in this picture, that dot is aligned with the position dot at the bottom, and they are connected by a layout line. Often however, this dot is obscured by the shading lines of the design, because the entries were never perfectly aligned.
fig 4
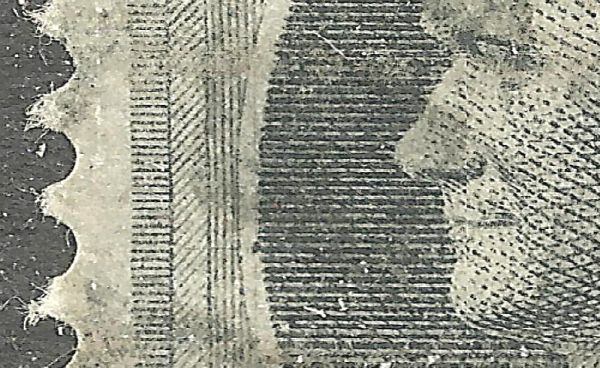
Here is a closeup of that spot on the plate number position from the proof strip.

As you can see, the dot marks the point of intersection between two layout lines. So to prepare the plate for entry, they scribed on the grid of layout lines, marked the intersection point with dots, added a dot to the outside dimensions of each column, and secured the plate in the transfer press for entry with the transfer roll.
What you have is a nice example of a stamp showing both types of position dot, pinpointing it to one of the 20 positions on the bottom row left or right. And, if I am not mistaken, there is also a residual layout line along the bottom of the design on line with the dot (looks like a fuzzy grey line in your scan). These are not commonly found, especially as nice as your example. Nice item!