Stamp Community Family of Web Sites
Thousands of stamps, consistently graded, competitively priced and hundreds of in-depth blog posts to read


Stamp Community Forum
 
Username:
Password:
Save Password
Forgot your Password?

This page may contain links that result in small commissions to keep this free site up and running.

Welcome Guest! Registering and/or logging in will remove the anchor (bottom) ads. It's Free!

Software : Free Form Border Around Fragments.

 
To participate in the forum you must log in or register.
Author Previous TopicReplies: 8 / Views: 1,540Next Topic  
Bedrock Of The Community
Australia
38679 Posts
Posted 07/08/2017   10:31 am  Show Profile Bookmark this topic Add rod222 to your friends list Get a Link to this Message
Seen in Auction Catalogues.
Say a 4-5mm border around stamp fragments.
Anyone aware of a program that does that please?

Example: Say I wanted a 5mm black border around this fragment.


Here we go, something like this:

Send note to Staff
Edited by rod222 - 07/08/2017 10:33 am

Moderator
Learn More...
United States
12330 Posts
Posted 07/08/2017   11:01 am  Show Profile Bookmark this reply Add 51studebaker to your friends list  Get a Link to this Reply
1. Apply a mask using the background color


2. Modify the mask by increasing it's size by about 20 pixels


3. Cut and paste as new image


Takes about 30 seconds per image (PhotoShop PaintShopPro, etc.
Don
Send note to Staff  Go to Top of Page
Pillar Of The Community
United States
2941 Posts
Posted 07/08/2017   11:01 am  Show Profile Bookmark this reply Add PostmasterGS to your friends list  Get a Link to this Reply
Rod,

This is fairly easy to do in most photo editing programs (Photoshop, Gimp, etc.). Do you have something along those lines? If so, let me know which one and I'll see if I can provide step-by-step directions.

If not, I'll see if I can come up with directions for Gimp, since it's free.
Send note to Staff  Go to Top of Page
Presenting the GermanStamps.net Collection - Germany, Colonies, & Occupied Territories, 1872-1945
Bedrock Of The Community
Australia
38679 Posts
Posted 07/08/2017   11:25 am  Show Profile Bookmark this reply Add rod222 to your friends list  Get a Link to this Reply
Gee.
Frankly I am IT challenged, it doesn't come naturally.
Don's looks easy, but I'd like to explore the sharp angular outlines if possible,
(Thanks Don)
So OK can we use "Gimp" if I download it please?

Gracious.


Send note to Staff  Go to Top of Page
Pillar Of The Community
United States
2941 Posts
Posted 07/08/2017   12:02 pm  Show Profile Bookmark this reply Add PostmasterGS to your friends list  Get a Link to this Reply
Rod,

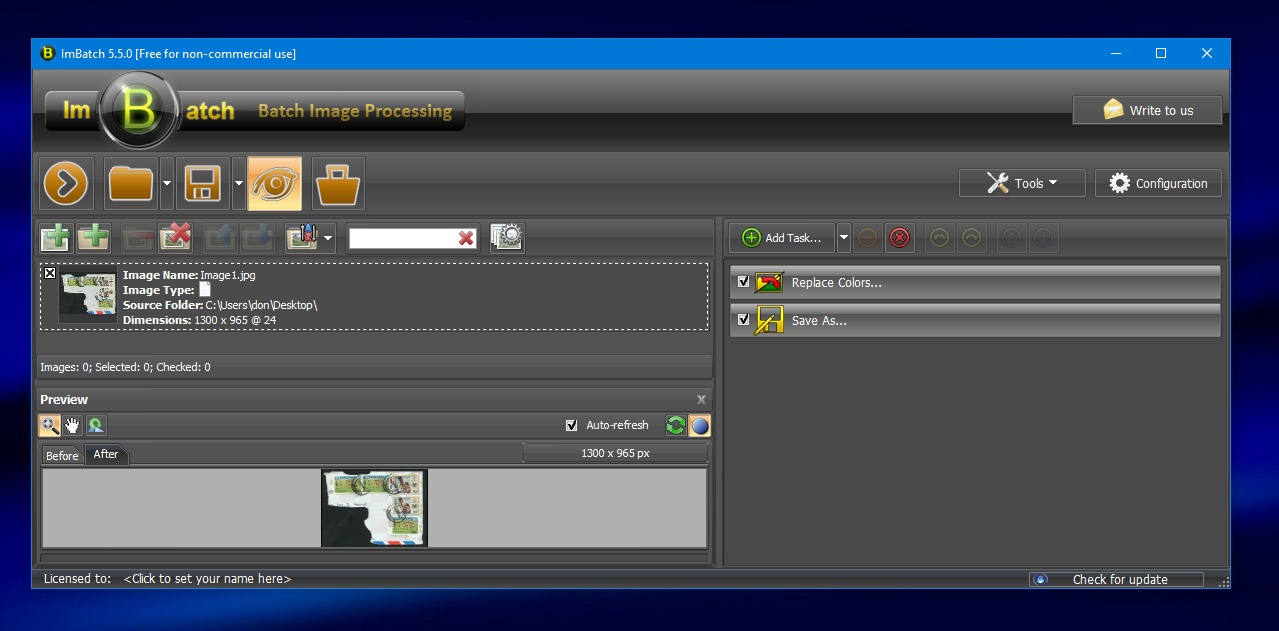
AFAIK, there's no way to get the angular look you're going for without doing at least some of it manually. Any photo program is likely going to simply add a consistent amount of space round the edges, and as you can see from your angular version, the border isn't consistent in width around the entire edge. I'll experiment and see if I can find out how to get the result you're looking for.

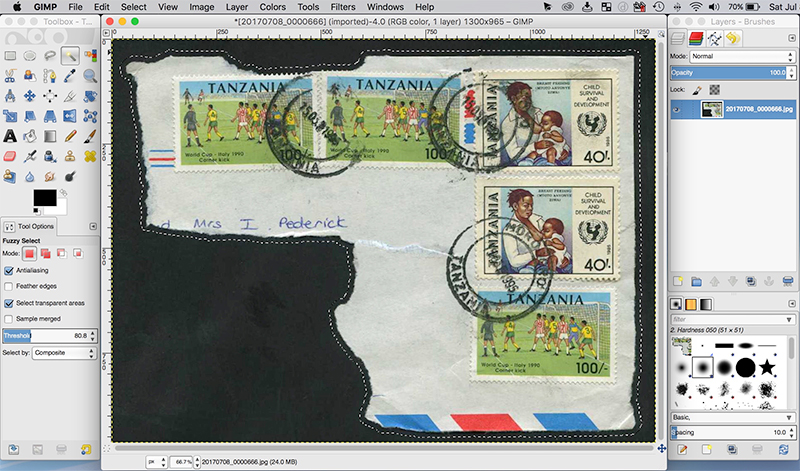
If you'd like to duplicate what Don showed, here's how to do it in GIMP. There may be easier options, but as I'm not on Windows, I'm not entirely sure what's out there that would work on your system.

You can download GIMP here.

Here's a very quick tutorial. If you get stuck, just ask.

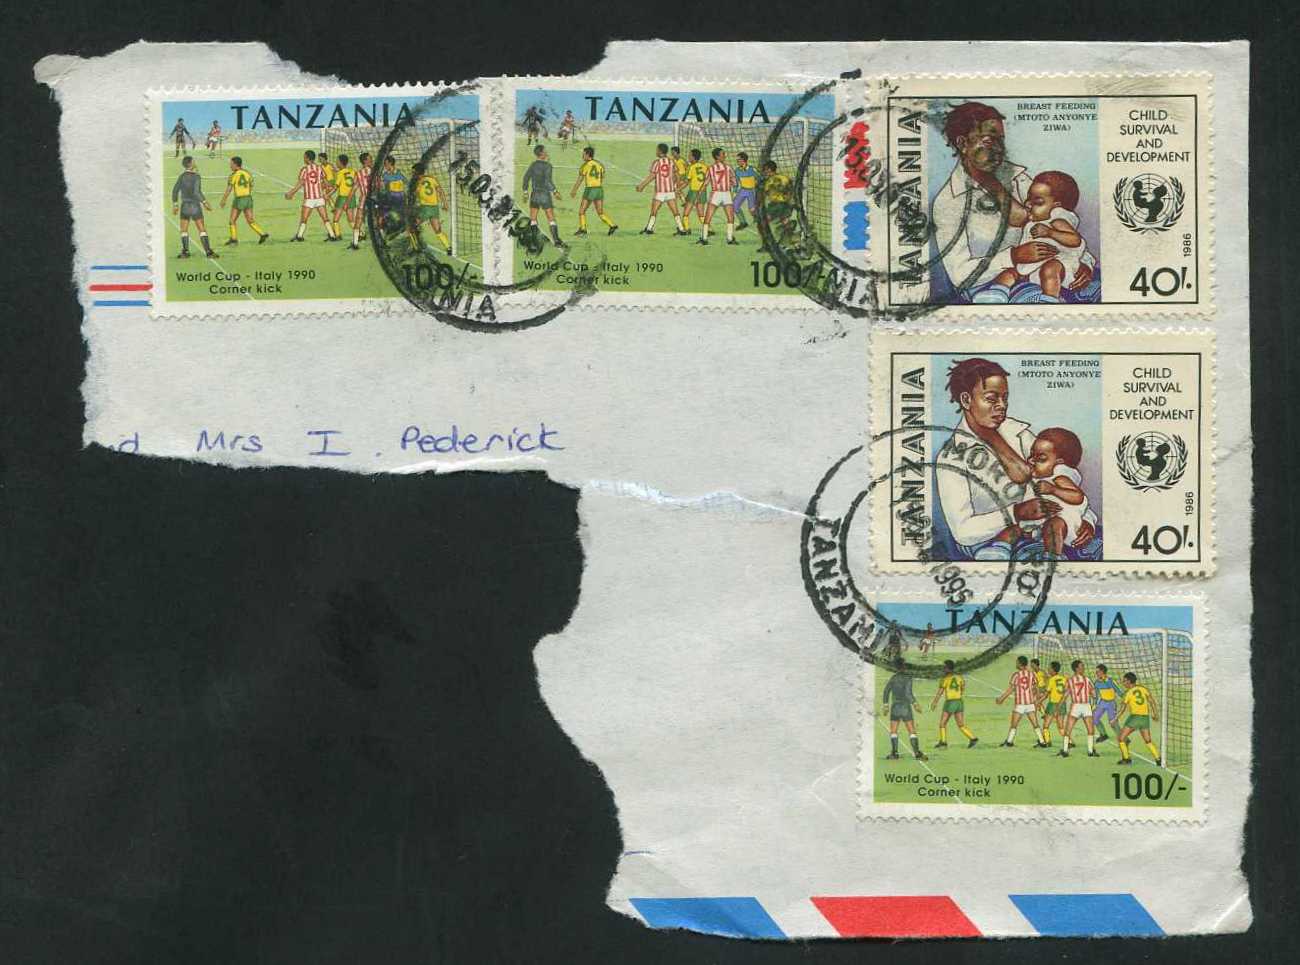
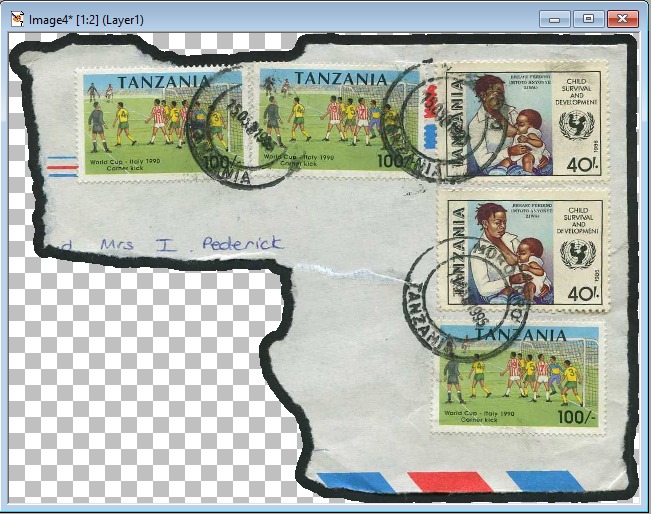
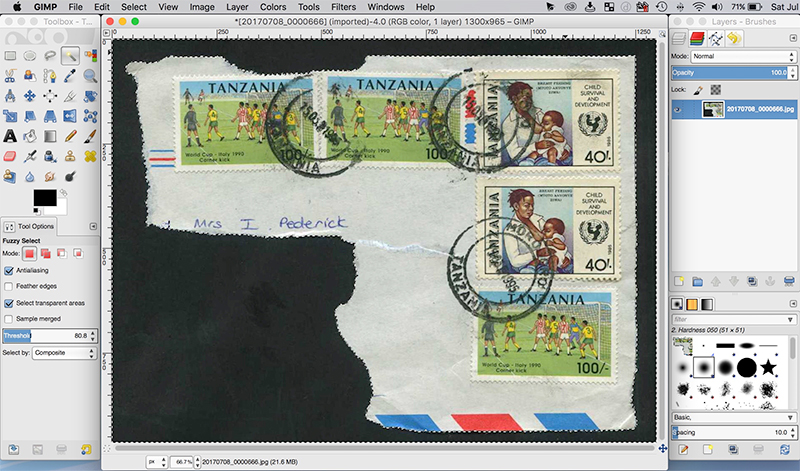
1. Open your image in GIMP.


2. Select the "Fuzzy Select Tool" -- top row, fourth from left or keyboard "U". This tool allows you to select a contiguous area by color.

Once you select the tool, you'll see an option lower down for "Threshold". This number controls how precise the tool is. A low number will select only the exact color you click. A larger number will broaden the selection. For this example I used a Threshold of around 80.

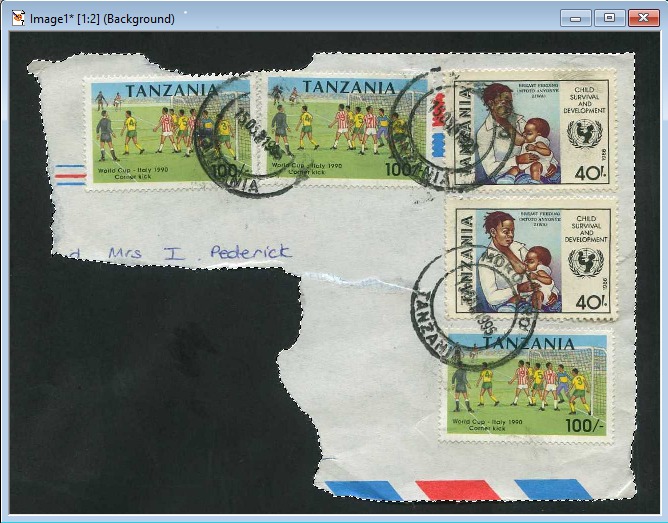
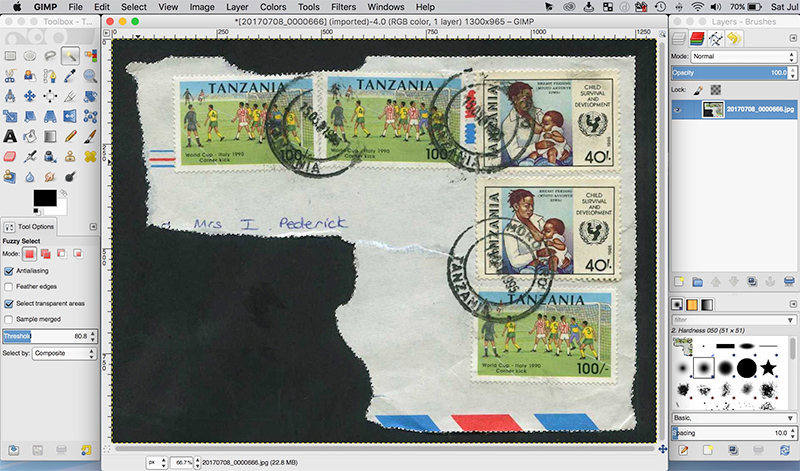
3. Once you have the Fuzzy Select Tool active, click on the black background. It should select everything except the stamp fragment. You should now see a faint dotted line around the background showing that it's selected.


4. Now you want to invert the selection so the stamp fragment is selected instead of the background. To do this, go to the toolbar and click "Select", "Invert".

The dotted line should now surround the stamp fragment only (though it may be difficult to tell a difference from the pervious selection).


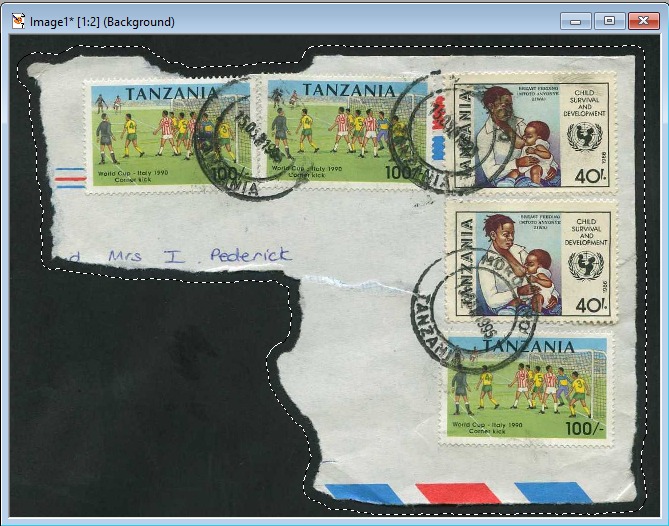
5. Now you want to expand the selection. To do this, choose "Select", "Grow" from the toolbar. A small window will open giving you an option to select the grow amount and the units to use.


6. Once that's done, you should have a selection that is just your fragment, plus whatever amount you told it to grow.


7. Copy and paste this into a new image, or into whatever document you'd like. If you paste it into a new image in GIMP, to save it in another format (jpg, gif, etc.), select "Export As..." from the "File" menu.

Send note to Staff  Go to Top of Page
Presenting the GermanStamps.net Collection - Germany, Colonies, & Occupied Territories, 1872-1945
Bedrock Of The Community
Australia
38679 Posts
Posted 07/08/2017   12:24 pm  Show Profile Bookmark this reply Add rod222 to your friends list  Get a Link to this Reply
Thank you Postmaster.
I'll download tomorrow, and do a road test.
I'll report on my findings.
Thanks for your efforts.
I also could benefit from cutting any fragments with straight lines
rather than the torn edge as in the example.

Send note to Staff  Go to Top of Page
Rest in Peace
Canada
5701 Posts
Posted 07/08/2017   3:52 pm  Show Profile Bookmark this reply Add BeeSee to your friends list  Get a Link to this Reply
What Don and PMGS displayed also works in Paintshop Pro, and the free Paint.net.
Send note to Staff  Go to Top of Page
BeeSee in BC
"The Postmark is Mightier than the Stamp"
http://brcstamps.com ---- BNAPS, RPSC, APS
Moderator
Learn More...
United States
12330 Posts
Posted 07/08/2017   4:12 pm  Show Profile Bookmark this reply Add 51studebaker to your friends list  Get a Link to this Reply
I'll throw this out there..

I am not sure about other folks but I often find myself faced with needing to do repetitive image processes (i.e. resize an entire folder of images, change color levels, etc.). There is a free Windows app which I recommend named IM Batch. http://www.highmotionsoftware.com/products/imbatch


Note: This app takes a little getting used to. You copy all the images you want to act on in the left hand window. You then build a set of 'tasks' to perform with the last task a 'save as' task. Once everything is staged, you hit the 'go' button and all the tasks are performed on every image you loaded. This is a HUGE time saver if you are manually manipulating every file. For example, I often use this to make thumbnails with a transparent background and save the files into a new directory.

It support 'selection' tasks and selection feathering so I think it will do what you need…the advantage to this tool is that you could do a large number of files all at once.
Don
Send note to Staff  Go to Top of Page
Bedrock Of The Community
Australia
38679 Posts
Posted 07/08/2017   7:24 pm  Show Profile Bookmark this reply Add rod222 to your friends list  Get a Link to this Reply
Thanks Don.

My MVS (Most Valuable Software) currently is Postmaster's "StampFix",
has saved me thousands of hours work, deskewing.
Made a tiresome task, a breeze.
But my scanner is screaming "I surrender"

In second place "Agent Ransack" for finding anything on my computer in seconds.


Send note to Staff  Go to Top of Page
Edited by rod222 - 07/08/2017 7:27 pm
  Previous TopicReplies: 8 / Views: 1,540Next Topic  
 
To participate in the forum you must log in or register.

Go to Top of Page

Disclaimer: While a tremendous amount of effort goes into ensuring the accuracy of the information contained in this site, Stamp Community assumes no liability for errors. Copyright 2005 - 2026 Stamp Community Family - All rights reserved worldwide. Use of any images or content on this website without prior written permission of Stamp Community or the original lender is strictly prohibited.
Privacy Policy / Terms of Use    Advertise Here
Stamp Community Forum © 2007 - 2026 Stamp Community Forums
It took 0.52 seconds to lick this stamp. Powered By: Snitz Forums 2000 Version 3.4.05