A bit long, but please bear with me. I want to outline what I've tried thus far, the results I've achieved, and also solicit feedback on the images as well as suggestions for improvement.
I've been increasingly dissatisfied with my Epson Perfection v500 flatbed scanner when it comes to high-resolution images (plate varieties). I'm perfectly content with its performance on stamps and documents in general; it's just when you need to pull out detail when highlighting plate varieties that it really struggles IMO.
It claims to have an optical resolution of 6400dpi, but I've found that as you go above 1600dpi the images are increasingly soft, which defeats the entire purpose. In order to achieve crispness in the details, I need to add multiple sharpening filter passes, which introduces all sorts of artifacts. Not good.
I'm using Hamrick VueScan as the scanning software so I'm not constrained by the scanner's packaged software.
I think I'm just butting up against the limitations of flatbed scanner technology without spending exorbitant amounts of money.
So I pulled out my old camera equipment from back when I was doing coin photography in the mid-late 2000s. I'm a novice photographer, so any success is pretty much by trial and error, and I managed to achieve decent results back in the day.
Camera: Panasonic Lunix G1 (micro 4/3)
Lens: Sigma 150mm macro (pricey in its time).
This got me a bit better than the scanner, but was limited by the resolution and features of a now 14-year-old DSLR. For example, there's no way to easily accomplish remote shooting (using computer monitor as a live display while shooting so you're not limited to having to use the camera's viewfinder or LCD display, both of which are too tiny to work effectively).
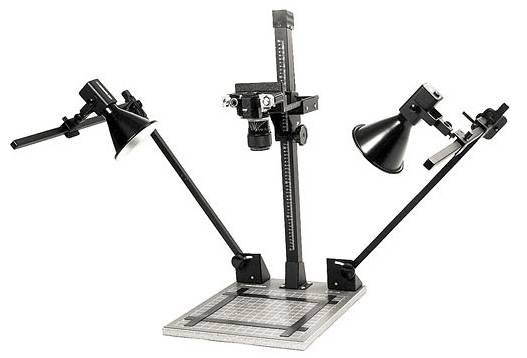
So I started going down the upgrade path to see if I could get decent results at under $1K for both camera and dedicated macro lens. I already have a robust copy stand with platform, so that's taken care of.
I picked up a Canon EOS Rebel T7 at Best Buy and after spending time researching online, a refurbished Tamron 180mm macro lens from Adorama. I managed to stay under the $1K target for the pair by about $150.
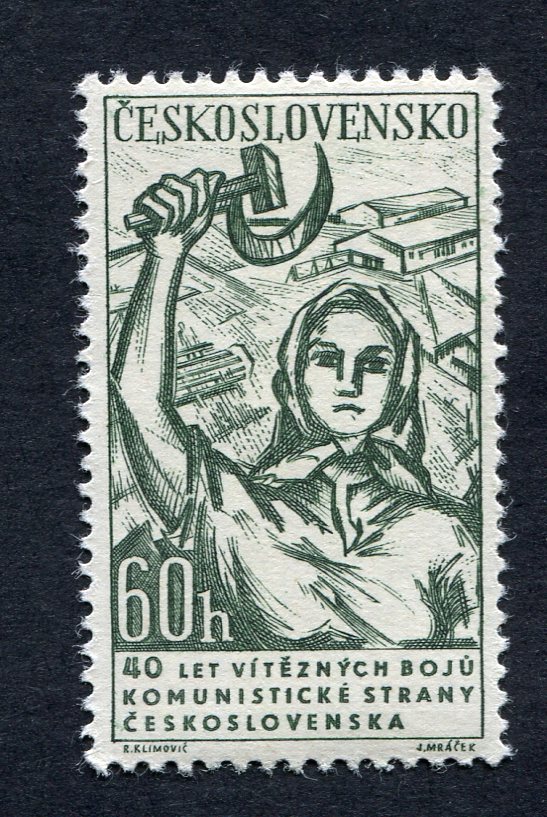
I'm going to show examples of the same stamp below, imaged as follows:
1. Scanner, 3200dpi. Sharpening enabled in Vuescan plus single sharpening filter applied in Photoshop.
2. Canon Rebel. (P) mode, f3.5, ISO 100. No filtering done in Photoshop.
There will be considerable color and brightness differences between the images just due to inherent differences in workflow. Image crop is different between the two as well.
Since the forum sizes down images to fit, you will have to click on images to spawn them in new windows to be able to view them at their actual sizes.
My assumption is that people will prefer the camera images, but that might not be the case. Any suggestions with respect to camera settings and methods to improve results would be greatly appreciated.
I have noticed that with the camera there is seemingly some reflection off the surface of the paper/fibres. I'm just using ambient room light, no dedicated lighting on the copy stand. Not sure if some sort of diffuser would help here.
I think the glare in the camera images actually detract from the visbility/clarity of the stamp details; in that respect I actually prefer the scanner images, but there simply isn't sufficient detail/clarity for those to suffice.
Thanks!
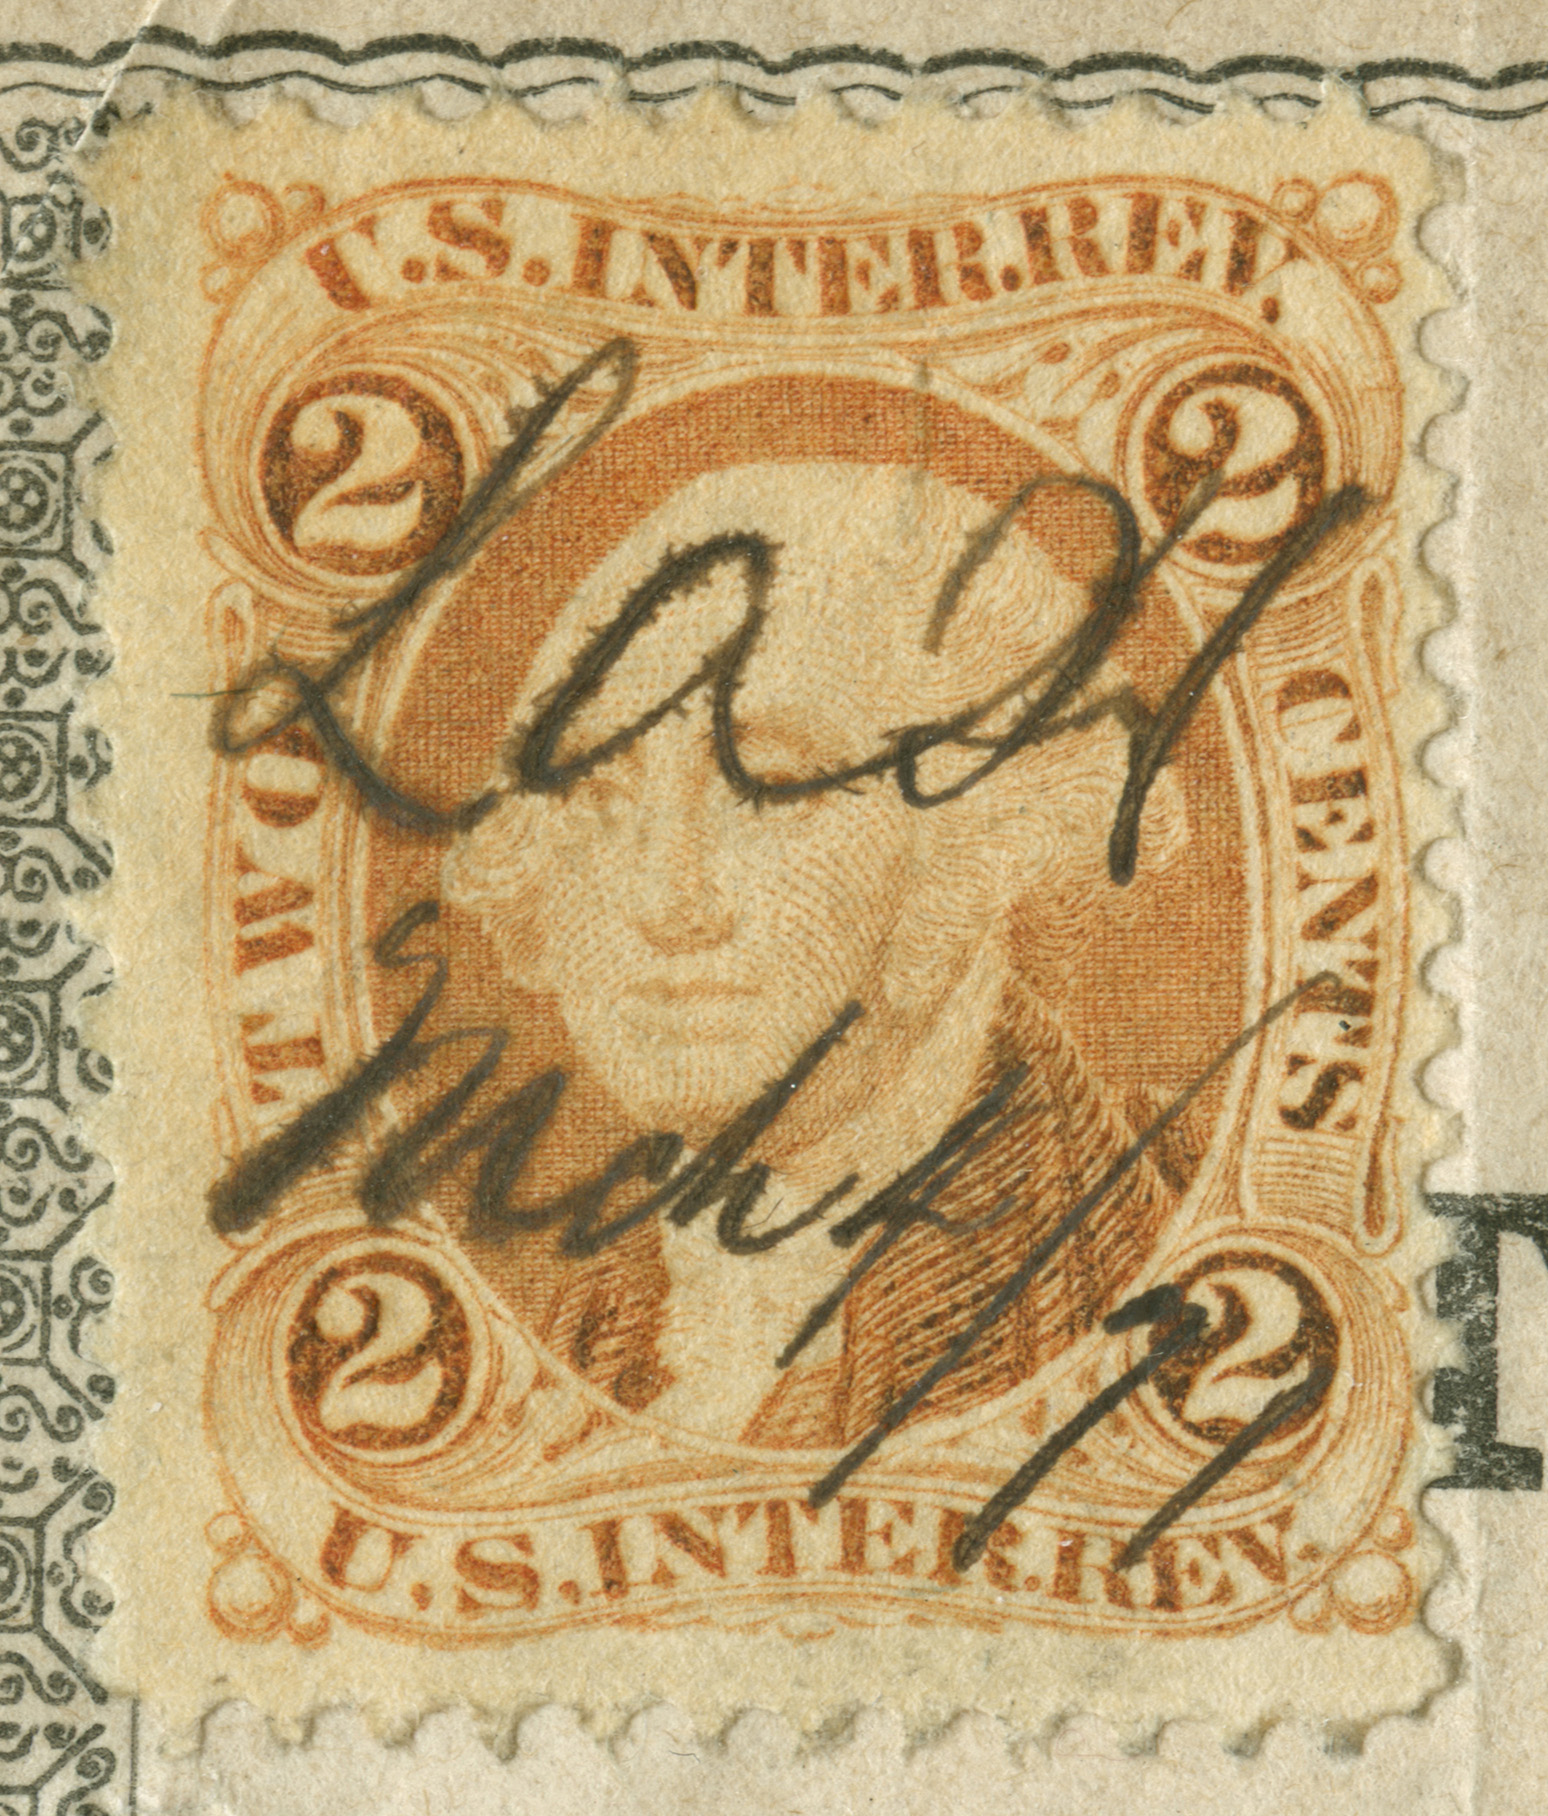
1. Epson scanner. 3200dpi. 100% (3096px x 3632px). File size: 2.34MB

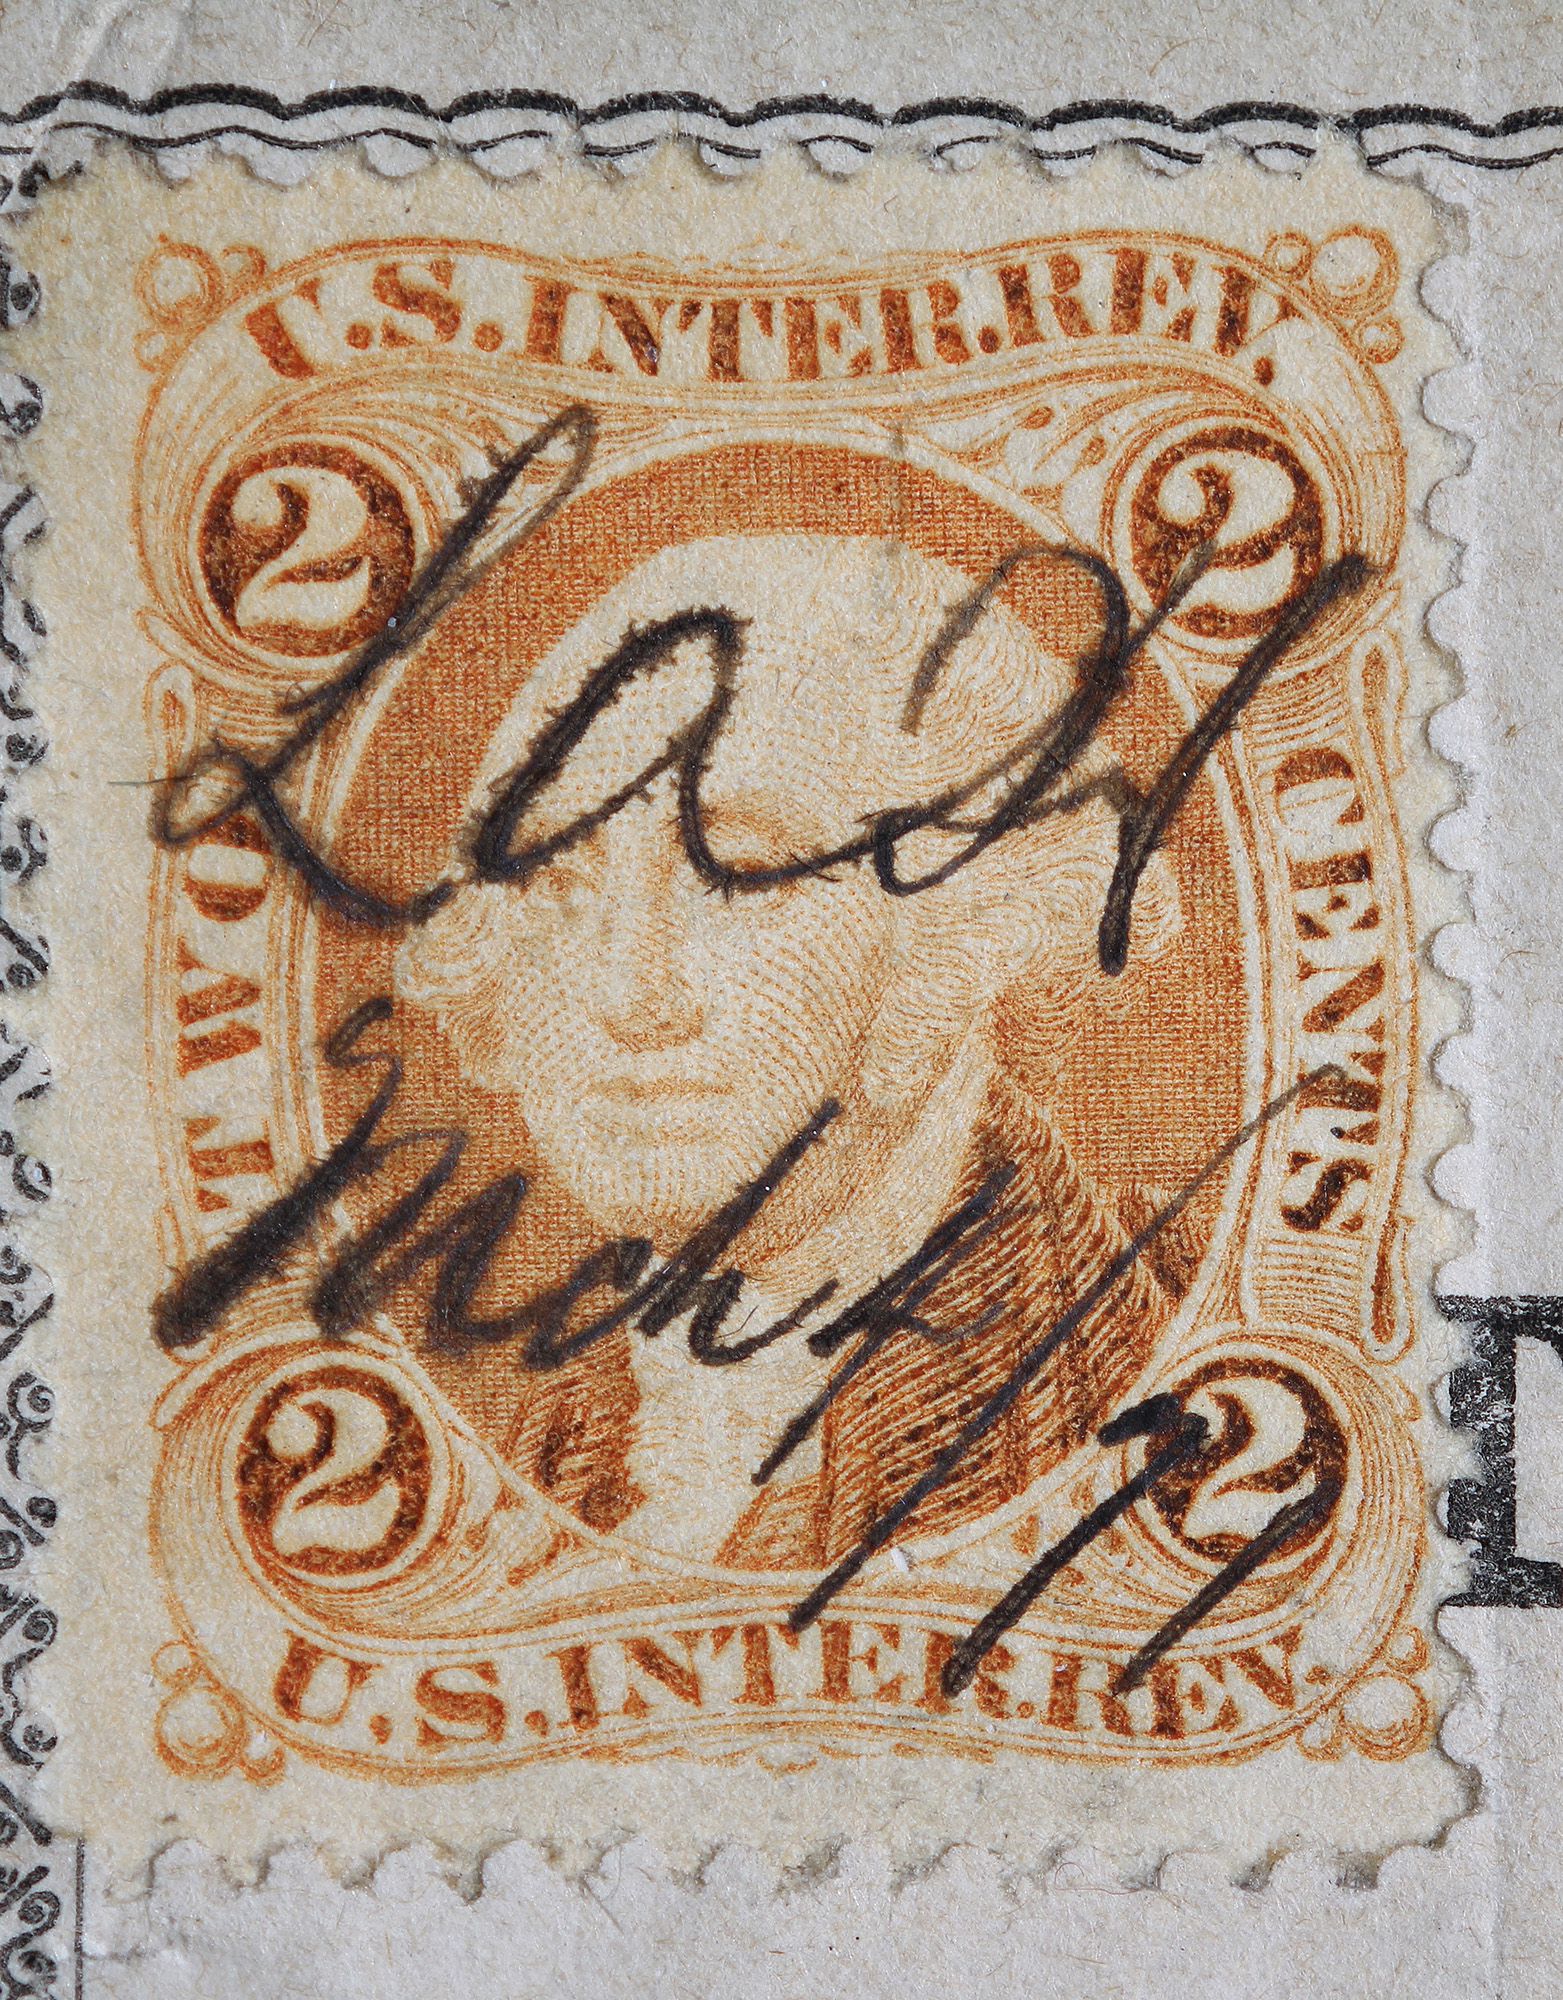
2. Canon camera. 100%. (3126px x 4000px). File size: 4.48MB

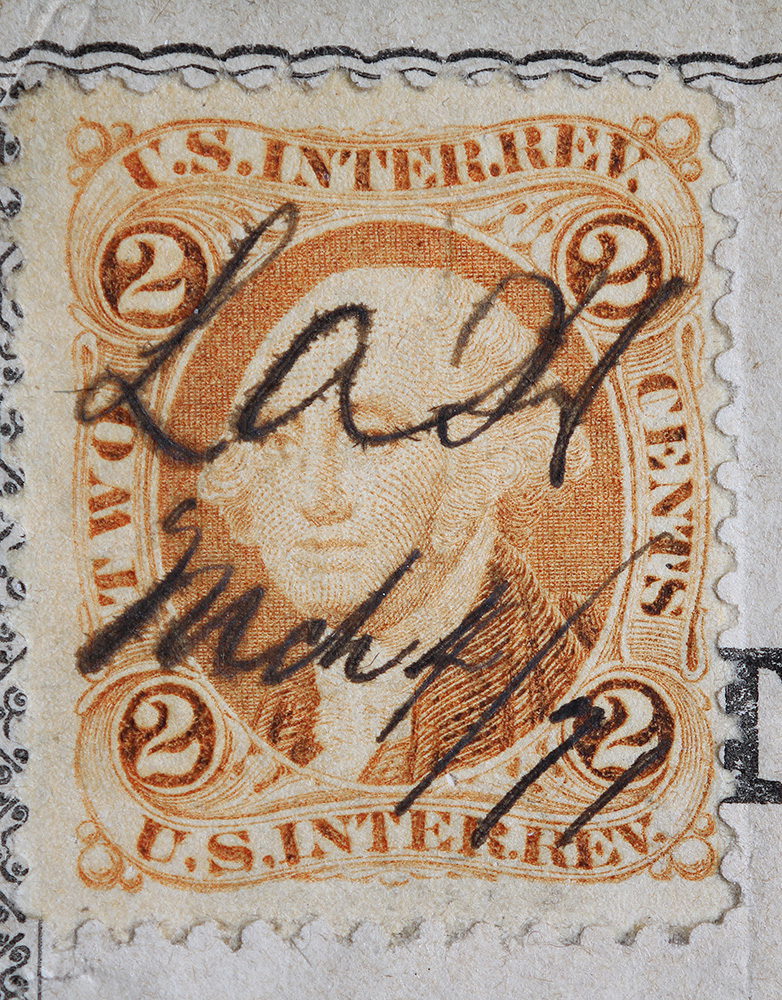
3. Scanner. Reduced from #1 to 50% in Photoshop (1548px x 1816px). File size: 962KB
4. Camera. Reduced from #2 to 50% in Photoshop (1563px x 2000px). File size: 1.66MB
5. Scanner. Reduced from #1 to 25% in Photoshop (774px x 908px). File size: 427KB

6. Camera. Reduced from #2 to 25% in Photoshop (782px x 1000px). File size: 618KB
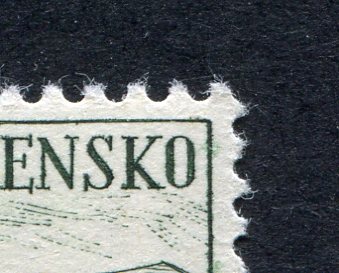
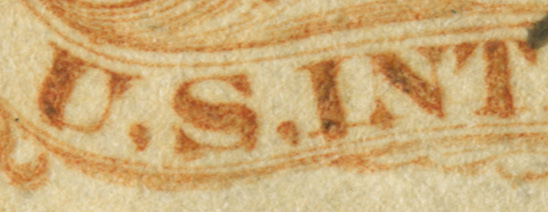
7. Scanner. Cropped portion of bottom scroll lettering from #1 @ 100%.
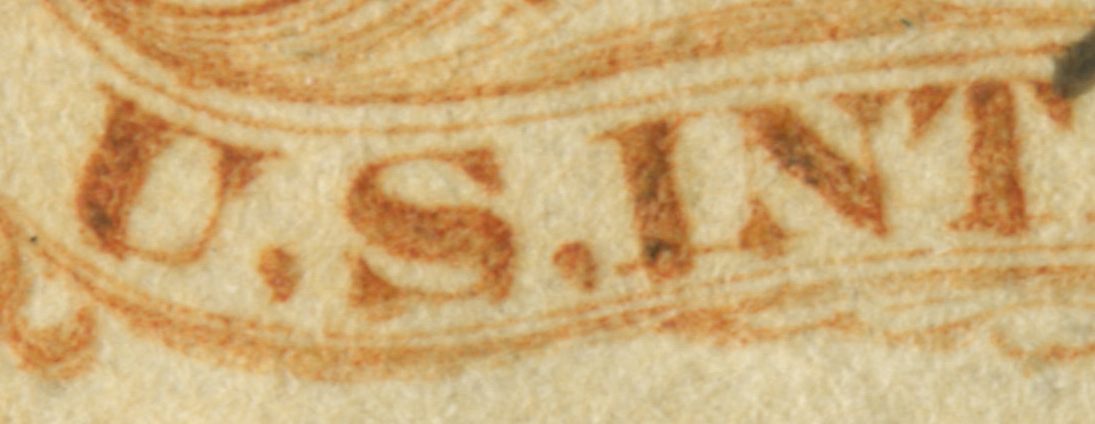
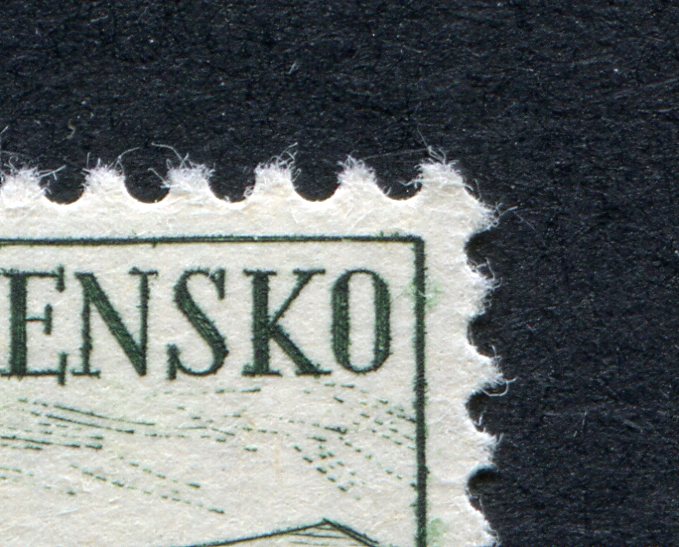
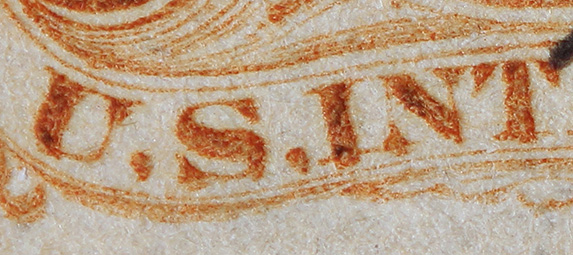
8. Camera. Cropped portion of bottom scroll lettering from #2 @ 100%.

9. Scanner. #7 reduced to 50% in Photoshop.
10. Camera. #8 reduced to 50% in Photoshop.
11. Scanner. Cropped portion of portrait from #1 @ 100%.

12. Camera. Cropped portion of portrait from #2 @ 100%.
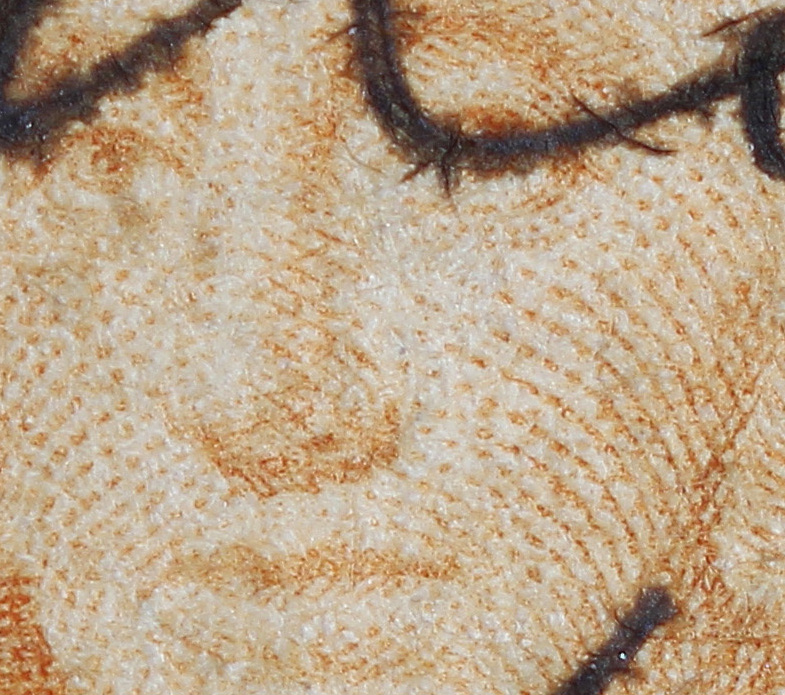
13. Scanner. #11 reduced to 50% in Photoshop.
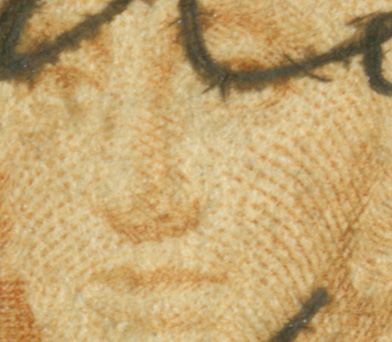
14. Camera. #12 reduced to 50% in Photoshop.